Temporary loss of performance of individual components and parts forces some motorists in a hurry to replace problem items. However, it is possible to carry out timely full-fledged diagnostics even in garage conditions in order to reasonably make decisions on further steps.
Often there are problems with various sensors in modern cars. Especially often, drivers are interested in how to check a lambda probe with a multimeter in order to reveal its current state. In some cases, competent testing allows you not to spend money on the purchase of a new part, because the problem is in a different plane.
Content
- 1 What is a lambda probe
- 2 Popular causes of sensor failure
- 3 Testing performance by improvised means
- 4 Car self-test lambda probe
What is a lambda probe
In fact, this device is an oxygen sensor. It is mounted by the manufacturer in the area of the exhaust manifold and helps to determine the concentration of residual oxygen in the exhaust gases. Due to the readings of this device, the electronic control unit of a modern vehicle has information on the basis of which the next portion of the air-fuel mixture is being prepared.
The probe calculates the volume fraction of oxygen in the exhaust and gives a signal to the electronics to prepare an enriched or lean mixture. Possible malfunctions with the node can lead to an imbalance in the operation of the fuel system as a whole..

A modern sensor is made in the form of a small device that includes certain elements:
- The metal case with the cut thread which promotes accurate fixing of the device in the place allocated for it.
- Electrical insulator made of ceramic.
- One or more conductors.
- Sealing rings.
- Protective sheath in which there are air vents.
- Contacts.
- Tip made of ceramic.
- Electric heater
- Exhaust duct.
- Shell of steel.
Technologically, it is provided that the measurements are carried out when the heating zone reaches 300–400C. In such a temperature mode, the electrically conductive ability of the special-filler located inside is formed. Until the system has reached the desired temperature, the electronics for its work takes readings from other sensors.
Popular Causes for Sensor Failure
Before you check the oxygen sensor with a multimeter, you should understand the possible options that can cause the unit to become inoperable. It is often accepted to divide factors into external and internal. These include:
- use for cleaning the sensor of drugs not intended for such an operation;
- penetration into the body of the probe brake fluid or the composition of the cooling system;
- the use of low-quality gasoline or diesel fuel with a high content of lead compounds;
- significant overheating of the sensor, usually associated with the operation of low-quality fuel;
- injector nozzles are clogged and do not allow for the supply of fuel in sufficient quantities;
- there are leakages in the engine cylinders.
As a result, a performance check will be required in the following cases appearing during vehicle operation:
- excess fuel consumption;
- noticeable jerks while driving;
- poor quality catalyst;
- revolutions of the power plant "float" in the twentieth century and during movement;
- Exhaust is present in the exhaust fumes.
Regular checking of the lambda probe with a multimeter should be done every 10–12 thousand kilometers with a multimeter. This will ensure the predictability of the functioning of the entire fuel system.
It is important to know that the recommended replacement interval of the oxygen sensor is about 40 thousand km.
Performance check using improvised methods
Traditionally, one of the available devices is used for monitoring:
- voltmeter;
- ampermetr;
- multimeter
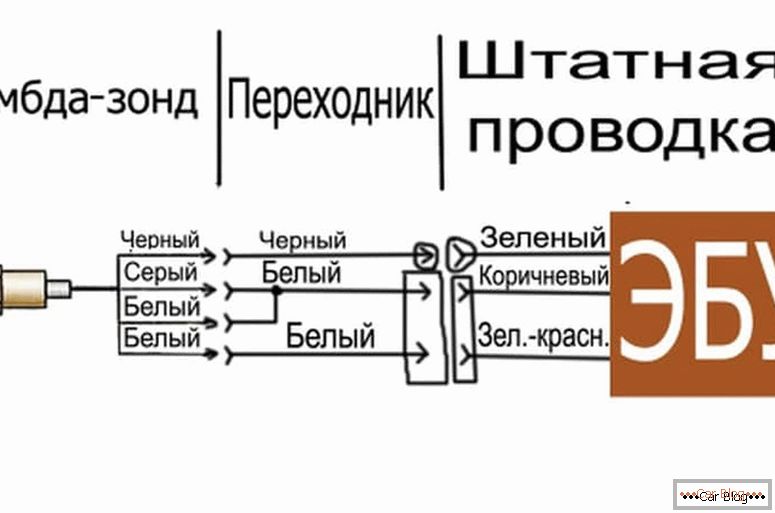
Using the available tester, any of the above, check the filament spiral thread. To do this, throw away the 4th and 3rd connectors from the pads, which are usually covered with white and brown insulation, respectively.
Connect the loose ends to the terminals of the multimeter. The optimal value is the resistance value, not exceeding 5 ohms.
Testing with multimeters demonstrates the sensitivity of the oxygen sensor tip. To control thermoelectric parameters, it is necessary to warm up the engine to an operating temperature of 70–80C. Then we proceed according to the established step-by-step algorithm:
- The engine speed must be increased to 3000 rpm, according to the tachometer. We hold this interval for 2.5–3 minutes, which will allow us to raise the temperature to the desired level.
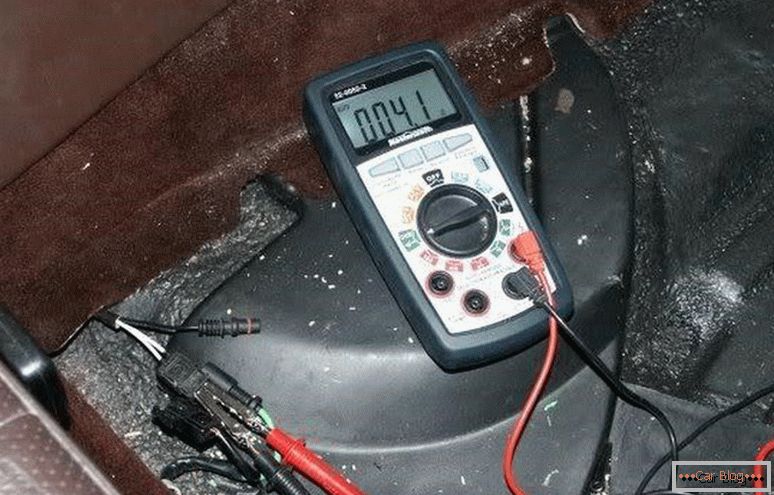
- At the multimeter we take away the negative terminal and connect it with the car body, with the area cleaned from paint or primer. The positive contact of the tester is held at the output contact of the lambda probe.
- We control the readings on the monitor. The value should vary in the range of 0.2–1.0 V. In this case, the change is performed with a frequency of 10 times per second.
- The assistant must sit behind the wheel and several times sharply press the pedal and abruptly let go. In this situation, the device demonstrates a value of up to 1 V, and then the indicator drops to almost 0 V. This type of work is optimal, and if, after manipulating the accelerator pedal, the readings remain stable at half a volt, then the driver should think about replacing the part.
There is also a case when there is no voltage in full. This is evidence of faults in the wiring. Ring the existing circuit with a tester in the area from the relay to the ignition wiring.
Motorists should be aware that the sensitivity parameters of the oxygen sensor are checked with maximum accuracy using a professional oscilloscope, which is quite expensive and can be detected at the service station.
Car self-test lambda probe
Advanced modern cars are often equipped with progressive onboard systems. In such a technique, there is a possibility, after receiving a Check Engine signal, to decipher the error code. Attention should be paid to the following encodings:
- 0130 - a signal that the lambda probe sends the wrong signals;
- 0131 - a low-power impulse comes from the sensor;
- 0133 - a device analyzing the volume fraction of oxygen, responds slowly to response;
- 0134 - from the sensor is completely absent any signal;
- 0135 - the electric sensor is likely to have problems with the heater;
- 0136 - there is a high proportion of the likelihood of a second sensor grounding;
- 0137 - too low signal is sent from the second sensor to the computer;
- 0138 - extremely high signal from the second lambda probe;
- 0140 - break of contacts from the analogizer;
- 1102 - readings from the device cannot be read due to low resistance or it is completely absent.
It is worth considering that all measurements should be carried out after complete cleaning of the device from carbon and other contaminants. This will allow you to get the most accurate result, reducing the level of error.


