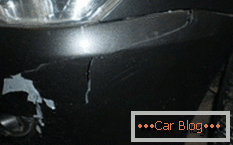
The most dangerous time of year for plastic parts of the body is winter. After all, slippery areas do not leave enough space for maneuvers and sometimes you have to ram snowdrifts or something more solid. In this case, the first affected area of the car is a plastic bumper.
You should not run to the nearest car shop and buy a new expensive part. You can repair the bumper with your own hands in your own garage. The result will be decent, and the savings can be spent on something more enjoyable.
Content
- 1 Major bumper defects
- 2 Preparation for the implementation of the main works
- 3 Recovery form
- 4 Surface leveling
- 5 enamel coating
Major bumper defects
There are three unofficial classifications of damage to bumpers:
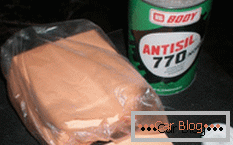
- Network scratching. The option is considered the easiest, as it requires the least amount of time and other resources. Often the job is to grind the damaged plane, to carry out the treatment with a specialized spray to improve the adhesive properties, and then to carry out the application of the paint layer.
- Chips, dents and cracks. The alignment is carried out using liquid plastic. Also irregularities can be put in order with the help of putty. To eliminate such defects will need an additional tool.
- Split bumper. Such a problem is solved individually. Car bumper repair during splits is carried out based on the degree of damage to the product.
Preparation for the execution of the main works
Before starting work, you will need to stock up on the necessary tool.

Crash bumper
It is hardly possible to do without such a minimum list:
- 40-60 W soldering iron;
- tweezers with long thin legs;
- building hair dryer average power;
- orbital grinding machine;
- coarse-grained and fine-grained grinding wheels;
- Consumables.
For high-quality processing of a broken or damaged bumper repair is desirable to perform on the removed product.
Dismantling does not take much time, but will save it during the work. This removes unnecessary stress in cracks at the attachment points to the car body.
It is advisable to wash the removed bumper from dirt and let it dry for further work. Further breakaway parts can be attached with adhesive tape, sticking tape to the outside of the bumper. After that, you can heat the soldering iron and start repairing the plastic bumper with your own hands.
Recovery form
Soldering fragments is carried out from the inside of the bumper. It is not visible from the outside, so you can conduct a training session on the conjugation of elements. Significant flaws will be hidden from outsiders. While working from the back side, you can feel the material, its reaction to the heated soldering iron and the behavior in a softened form.
-
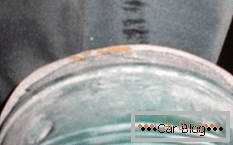
- Step 1. Fold the bumper parts and fix them.
-
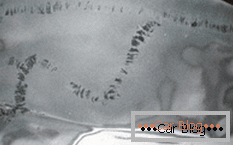
- Step 2. Connecting the gap using brackets
-
- Step 3. Fixed by soldering
-
- Step 4. Solder the entire length
-
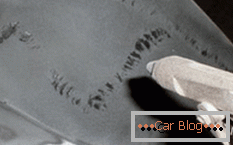
- Step 5. Close the staples from further oxidation.
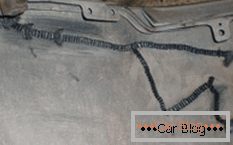
It is desirable to work smoothly, without a long delay in one place and abrupt transitions between sealed areas. The perfect seam looks uniform, and the material is not subjected to deformation in other areas without damage.
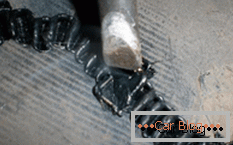
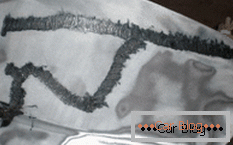
To make the soldering stand for a long time without deformation, it is desirable to fix the additionally sealed cleavage line with metal clips using a furniture stapler.
The legs of the brackets should be chosen so that they do not come out from the back of the bumper during reinforcement.
To avoid burns, use a pair of tweezers.
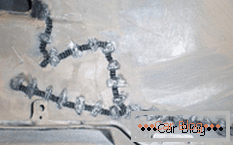
Staples with each other must be installed at a distance of 2 cm. All emerging cracks should be soldered. This will prevent the emergence of new splits at the site of kinks during driving and vibration.
Staples must be protected from further corrosion. To do this, you will need to pull a little plastic from the adjacent areas and completely cover the metal parts. After such preliminary work, the form should return to its previous state.
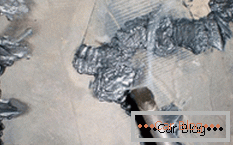
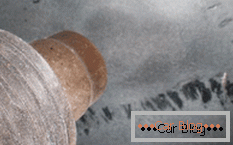
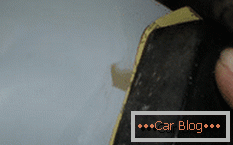
We put a circle on the grinding machine with grain marking R240. With its help we clean paint, varnish, unevenness and roughness. After that, we carry out the soldering on the front side of the bumper, but only without using reinforcing brackets. Excess plastic soldered cracks and caverns.
Surface leveling
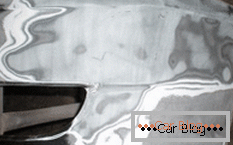
After cooling all surfaces with a grinder, we perform a grinding of the seam. It is not worthwhile to remove all the scuffs, it is enough to prepare the surface in draft form, removing as much as possible the irregularities and smoothing the projections. The soldering iron can penetrate deep into the body of the bumper, you do not need to get carried away and reduce the thickness too much, as you need to repair the bumper carefully, leaving it with the maximum possible strength characteristics.
-
- Step 1. We clean using OSHM
-
- Step 2. Visually inspect the surface.
-
- Step 3. We rub the seams after cooling
-
- Step 4. Sanding the seams with a typewriter
-
- Step 5. Visual inspection
-
- Step 6. Purging with compressed air
-
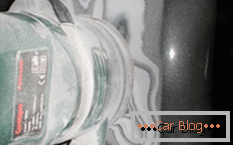
- Step 7. We shape using an industrial hair dryer.
Grinding electrifies the bumper surface. After that, dust particles, villi and other small debris stick to it. You can get rid of this with compressed air. You can also wipe the surface with a clean cloth.
Working with an industrial hairdryer, leveling the surface, you need to know that plastic can leak out of a significant overheating, the fibers will lose their original shape. After finishing with the alignment, you need to remove the caverns by treating the surface with a special putty for plastic.
The material is applied only to align the formed pits, and the excess part must be wiped off. Having given time to putty to be polymerized, having received solid material, the surface is once again processed by a grinder.
Enamel coating
After finishing the final finish, it is necessary to remove all dust from the surface. Now you can apply the primer on plastic. Dilute the mixture, following the recommendations of the instructions for use. Apply two layers with an order of 15 minutes. Apply a layer of spray on the treated area.
-
- Step 1. Dry and apply a preliminary basis.
-

- Step 2. Surface coated with primer
-
- Step 3. Putty leveling the surface
-
- Step 4. We perform grouting after the putty has dried
-
- Step 5. Apply several layers of paint, letting the previous layers dry
-
- Step 6. Mounting the bumper on the body
This procedure is needed to mark holes, protrusions and other irregularities for grinding. After grinding, the development on the convex places will be removed, and it will remain in the hollows. Get at this stage a flat surface will help nitroshpaklevka. It is applied to cleaned and primed surfaces.
When the process of hardening nitroshpaklevki, the surface is subjected to polishing.
Now for a better adhesion of enamel, you can apply a base layer. It binds at the molecular level plastic and paint.
After the base can be enameled at least in two layers, allowing the previous to dry.
Then apply a lacquer coating. The dried product can be carefully mounted on the car. Only professionals can see the traces of repair after such processing, and then only after a thorough examination.


