Passion for karting sports for many fans begins with a young age. At this age, according to the law, it is still too early to have a driver's license, so young drivers are looking for inspiration on specially designated tracks. However, not everyone has the opportunity to purchase such a vehicle, so you have to look for options on how to do karting with your own hands.
In the case of self-manufacturing of a small car with an internal combustion engine, it will be possible to significantly save on assembly. In this case, the device will be most adapted to the specific driver. It will also be possible to create an independent design for a personal four-wheeler, which will give the maximum individuality of the vehicle.
Content
- 1 What is karting
- 2 Initial design phase
- 3 How to collect cards
- 4 We collect karting with their own hands (a guide with drawings)
- 5 Installation of the steering column and engine
What is karting
This sport is among the most popular among young people interested in motorcycles. The older generation can also take part in it. Avtomobilchiki unusual, at first glance, the form can give positive results
- certain driving skills;
- add adrenaline to the blood;
- allow yourself to "feel" the car and love the technique.
A kart is a vehicle in the form of an open minicar, in which there is usually no suspension and many traditional systems are simplified. Also feature of it is the ability to speed up in a short time.
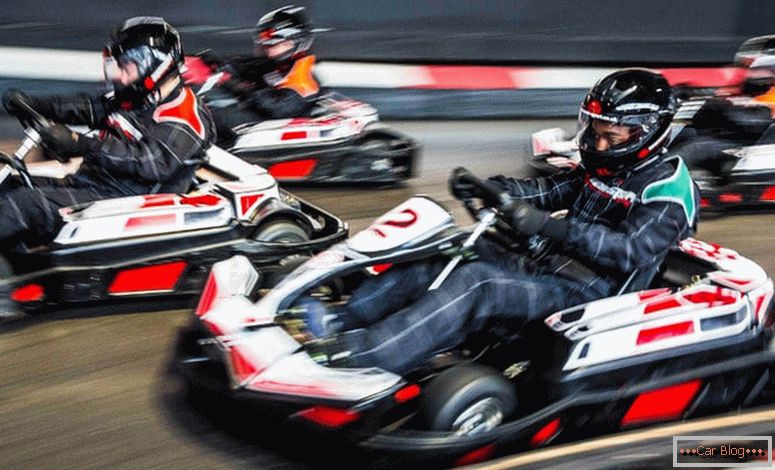
The hobby draws lovers in such a way that they make hand-made karting with their own hands in order to get a unique result. You can also put the production on stream, turning it into a small business.
Initial design phase
Production starts with the formation of the project. The optimal shape and comfortable dimensions are selected. The authors are limited only by designer fantasy. It is important that only basic management and security systems are available. The home-made apparatus must have the following modules:
- steering system;
- chassis frame;
- internal combustion engine;
- brake system.
It is worth pre-sketching a plan with the location of important nodes. This is done on a scale, preferably on graph paper or in a convenient computer program. Inspiration in design can be searched on the Internet, looking at photos of modern models of karts.
A more expensive option is to order drawings in a specialized design bureau. However, with such work, you can be confident in the result, because competent engineers are able to calculate and implement the project, taking into account all the power loads, using reinforcing materials, theorem and other sciences.
When choosing dimensions it is necessary to take into account the height and weight of the driver, so that he easily fits in the parameters of the car. Traditionally, the size of a minicar depends on the age of the driver. In most cases, adolescents can get along with a length of 1.3 m and a width of 0.75 m. For adults it is worth raising the bar to 180 cm and 100 cm, respectively.
-
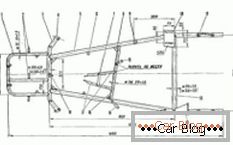
- Frame drawing
-
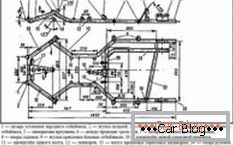
- Assembly positions
-
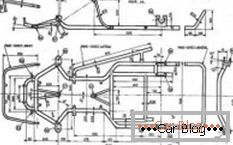
- Drawing in two projections
-
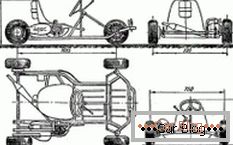
- Complete assembly
The maneuverability is influenced by the center distance. At 130 cm total length, a value from the interval of 1-1.2 m will be convenient. It is advisable to draw everything on the sketch in three projections right away in order to visually perceive the parameters.
How to collect cards
Selection of materials is conducted in specialized stores, on metal sites or in construction markets, where a specialized metal with different properties is offered. It is selected according to the required characteristics on the basis of labeling and assortment. If there is a broken equipment such as lawn mowers, trimmers or mopeds, then part of the equipment can be obtained during dismantling.
When assembling individual components and systems, it is important to take care of a sufficient set of necessary materials. For the brake and steering system will require:
- wheel;
- multi-stage gearbox;
- hand brake;
- small diameter wheels;
- minimum pair of pedals (gas / brake);
- set of ball bearings;
- shafts for steering and drives.
The power unit needs a snap:
- internal combustion engine;
- drive chain;
- fuel tank of at least 3 liters;
- a set of hardware (nuts / washers / bolts / screws).
Assembly of the chassis is carried out at the expense of this range:
- profile tube (square section 25x25) with a length of up to 10 m;
- thick-walled round tube 2 cm in diameter and 2 m long;
- pipe 15 mm in diameter and 2 m long;
- material for the bottom and back of the seat (tin or plywood);
- armchair of the minimum sizes.
Having drawings of a go-kart frame, metal blanks are prepared. To do this, a pre-acquired metal grinder for individual elements for welding. Since the chassis is the basis, it is originally carried out welding and assembly of this particular skeleton kart. If there are no skills to work with welding equipment, then you will have to invite a third-party specialist, which will significantly reduce the time and improve the quality of work. Thus, the base will be strong and not have microcracks, which can lead to undesirable negative situations on the track.
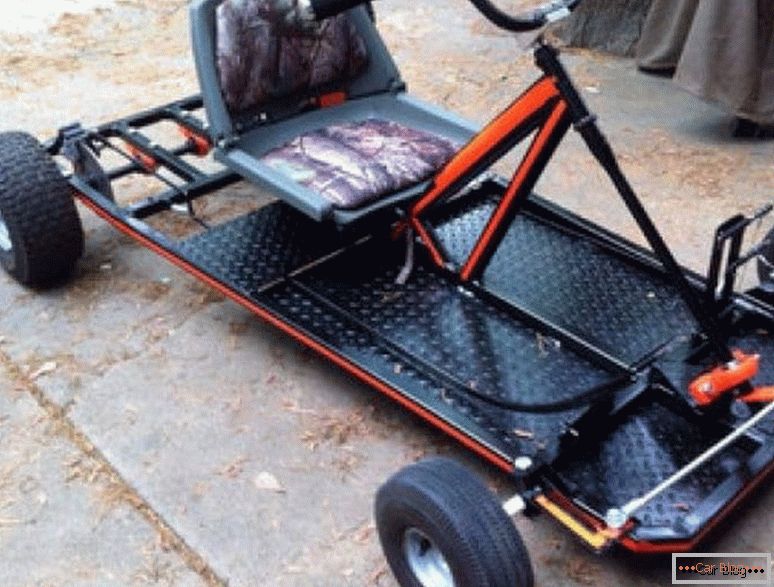
It is important to know that welding should be carried out under high temperature conditions, which will give a high degree of metal penetration and minimize the formation of slag in the seams.
Modern manufacturers offer to simplify the assembly according to the drawings. In this case, it is recommended to use ready-made metal structural elements, which are offered in the form of a set-designer. The estimated cost of such elements will be about 30-40 thousand rubles..
We collect karting with our own hands (a guide with drawings)
The assembly is carried out according to the drawing, which was previously made in different projections. It is advisable that it be applied on thick paper. In some cases, auxiliary tools, such as clamps, are needed to hold the components in position for welding or for joining with bolts.
It should be borne in mind that for karting characteristic feature is that the angle of collapse of the front wheelset is less than that of the rear pair. This feature allows you to rotate, ensuring easy tightening of the chassis. Achieve similar effects in the following case. The steering axle is fixed at the front corners in the area where the wheels are to be mounted, which will allow for a slight scrolling of the system.
Beginners can pre-mark chalk on the floor for easy assembly.
Welding should be carried out so as not to “lead” the mating elements. In some cases it will be necessary to press the components with a heavy press, for example, a concrete slab. After the seam has cooled down, it must be checked for durability by a convenient method. Often, wooden wedges are used for positioning so that the assembled mockup does not “float”.
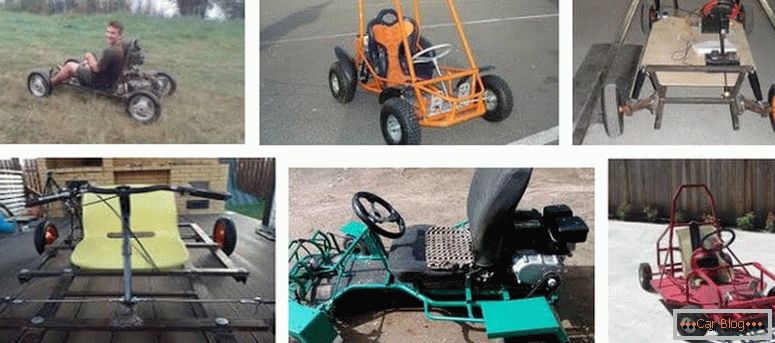
After welding the "skeleton" on the front of the axis set plugs. The axis itself is a 20-mm pipe connected to the frame with a pair of bushings. Fixed all bolted connections. Plugs are mounted before starting work with the steering unit.
The rear axle provides a rigid attachment to the frame. It is much easier to mount, since there are no levers characteristic of the front pair of wheels. To ensure the free rotation of the rear axle, you need to install the support brackets with bearings. It is advisable to fasten such a knot to the frame with bolts, lock nuts and washers, and not by welding. This will give a more accurate result.
At the next stage, the seat and the bottom are mounted, which protects the driver from mechanical damage and pollution from below. It is made the last to fully distributed over the entire horizontal surface.
As a comfortable chair suitable design from any seat with comfortable pads. Often the master does not bother with the manufacture of this element, but simply buy the appropriate option in the store. It is important to choose a seat that has at least minimal lateral support so that when the driver turns, he cannot stand out of his seat. It is also important to leave enough space so that it is comfortable to move the levers and push the pedals.
See also: What is the VIN-code of the carInstallation of the steering column and engine
Choosing a motor from a trimmer or chainsaw for your go-kart, we carry out small preparatory work with it. We get rid of unnecessary elements, including a chain, switching knobs, fuel tanks, rigid elements, etc. It is worth considering that the moment of redoing to fit your asterisks is problematic.
The main for the new star on the drive shaft is old. Pre-count the number of teeth on it. Through the cooling casing we make a couple of technological holes required for mounting the power plant to the subframe. If the novice driver is satisfied with a small power at a sufficient speed, then the best and cheaper option is to use the engine with a trimmer.
It is more convenient to mount the power plant on the prepared suspension. To do this, we weld a special plate of steel on the back side of the structure. Position the motor so that the drive pulley is centered along the axis of rotation with the driven pulley. Mark up the holes for mounting bolts.
Fixing the pulley on the axle should start after the axle is inserted into the sleeve. The installation screw will help in this situation.
The steering gear assembly begins with the installation of the tube (future axis) with a diameter of 15 mm. You will need to bend it at 90 degrees. In this situation, you need to heat the place of the fold with a gas torch or with the help of a blacksmith's forge. In the process of aligning the steering wheel, adjustable joints are used, which minimizes the effort to adjust the camber / toe.
Installation of the brake system is mandatory, since it is forbidden to operate the device for safety purposes without it. It should be borne in mind that the provision of racing performance is supported by the installation of racing wheels. They have a wide base and small diameter. Installation is carried out on the front and rear axles, and only after determining a clear installation position is the installation of the brakes.
Fix the caliper to the chassis and drive to the rear axle. For the brake system, a pair of wheels must be selected. The safest option is to mount on each axis on both sides of the kart.
To facilitate their work, the masters use brake systems from old motorcycles or from scooters. They are usually searched for on legal disassembly or on the Internet. It is important to install the brake pedal, which significantly frees your hands to control the transport. At the same time, it is necessary to take care of the side railing for the feet near the pedals so that they do not fly to the side during turns at speed.
Ignition system and gas are controlled through the foot pedal. Although it is allowed to feed in the same way as in lawn mowers - a manual system. This is a matter of taste or habit of the driver.
Mandatory step is to test all components and systems, including the brake. This is done on a free highway subject to safety regulations. The driver in any conditions must be in a protective helmet and have eye protection: a visor or goggles.
It is not recommended to accelerate on homemade above 30 km / h, since not all structures are able to withstand the strength under such a load. It is forbidden to travel on such equipment on public roads, because the home-made does not have the appropriate permits and quality certificates.

