The safety of the car, especially the new one, is a very urgent problem of the modern car owner. There are several ways to protect a car, the most popular of which is the installation of an automatic alarm system on it. Installing an alarm in a specialized center takes little time and guarantees the quality of the work. But there are also disadvantages. The first of which is the high cost of work, the second is the use of standard schemes for equipment placement, connection and wiring. But in the presence of a simple tool and certain skills, installing a car alarm with your own hands is quite a feasible procedure.
Content
- 1 Equipment and materials
- 2 Installation of equipment
- 3 Electrical connection
- 4 Wiring
- 5 Lock the power plant
- 6 Installation of car alarms on the example of the VAZ 2110
- 6.1 The process of installing an alarm on the car VAZ 2110
- 7 Verification
- 8 Let's sum up
Equipment and materials
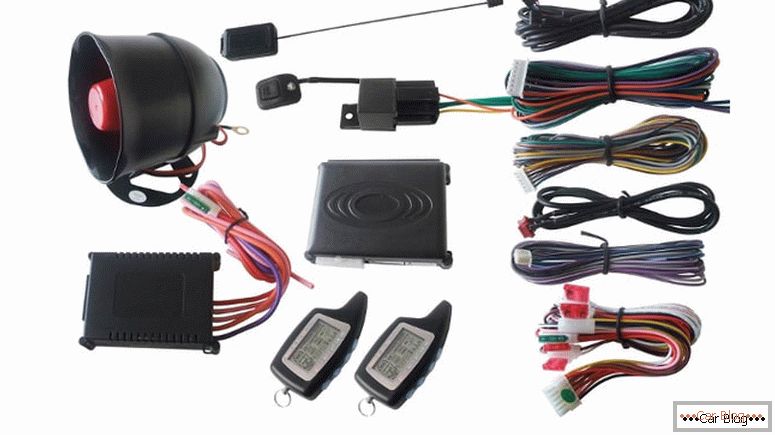
Car alarm kit
When choosing a set of alarm should follow the rule that the cost of it should be 3-5% of the cost of the machine. Installation of a security kit of 150 thousand on a car worth 300 thousand rubles will be clearly unreasonable. To install the selected alarm kit on the machine you will need:
- automobile set of the metalwork tool;
- a wire stripper;
- heat shrinkable tube and lighter;
- electrical tape in the color of the insulation wiring of the car;
- multimeter or other instrument for measuring voltage and conductivity;
- double sided tape;
- splenitis or regular foam;
- scheme of electrical equipment of the car.
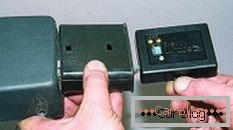
Installing an alarm with your hands will require accuracy and patience, you will have to disassemble the front panel, the column cover and other elements of the interior trim.
Installation of equipment
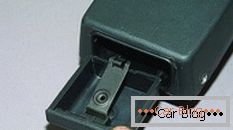
At the first stage of the installation of the alarm, you should deal with the alarm itself, for which you should study the enclosed instructions. Next, you need to understand the wiring of the car, which would require a diagram of its electrical equipment. The next stage involves the selection of the installation location of the control unit and the signaling device. If everything is clear with the first one, it is installed in the most inaccessible place - under the front panel, then with the second one is not so simple. It is usually placed under the hood, but each model of car in the engine compartment has a limited number of available places where you can easily install a siren. The harder it is to get to the source of the audio signal, the harder it is to turn it off. When disassembling the front panel and the steering column cover, plastic clips can be used, so for mounting it is better to use special plastic montages. So you save the trim from damage.

To install the alarm will have to disassemble the dashboard
Electrical connection
The alarm outputs must be connected to the turn indicators or car marker lights, to the light bulb, which is responsible for indicating the opening and closing of doors, as well as to the indicator lamp of the running motor. If the panel of your car is optitronnaya, then the only thing that can be connected is the turn signals. In order to make the installation of wires, on the back of the panel you need to find the light bulbs that are responsible for the indication of the turn signal. We find a charge of light bulbs, tracks are made on it. We need to find a 12-volt contact and check it, for which we connect the connector to the track, turn on the turn signal and throw in a multimeter. If you find the required wire, the multimeter will indicate the presence of voltage at the moment when the turn signal lamp lights up.
Note! Search for wires using the "light bulb" principle is unacceptable when working with the electrical system of the car. The use of this method can be expensive for the car owner, because you can easily disable the entire power supply system of the car.
As a matter of fact, we are looking for the wire responsible for opening and closing doors on the same principle. When the door of the car is open, the readings of the multimeter should be equal to 12 V, and therefore, when the door is closed, they are equal to 0. We find the control wire for starting the motor using the same method. However, if in your car this function takes over the tachometer, then test it in this way will not succeed.
See also: How to make a bumper with your own handsThe wiring diagram of the alarm system provides for the connection of the control unit and the central locking of the car. It is best to do this by connecting to the lock on relay. We will look for it by analogy with previous actions.
Wiring
When laying the alarm wires should be assembled in directions to the bundles and wrap tape. Insulating tape should not be much different from the factory insulation of wires. This will make it much harder for hijackers to find wires that need to be cut. In addition, the use of electrical tape serves as additional insulation for wires, increasing reliability. It is best to solder and insulate the wires to the connectors with a shrink tube, and then wrap with insulating tape. When connecting wires, you can use special clips, but their use significantly reduces the time it takes to determine the hijacker of the desired wire. When wiring under the hood (connecting the limit switch and siren), you should run the wires along the existing bundles of electrical wires, making them less noticeable.
Properly installed alarm will help protect the car from being hacked
Lock the power plant
Installing an alarm on a car also implies blocking the engine in case of unauthorized start of the car. Most often used for this connector ignition. To determine the desired connector you need to ring the lock. The wire that has voltage when the key is “ON” is selected and disappears in the “Start” position. To block the engine, remove the connector from the ignition lock and short-circuit this wire with a jumper to a permanent plus, and a second jumper with a permanent plus and a starter terminal. If the engine is started, then remove the jumper on the starter, the car is muffled and the found wire is cut. Next is the connection of the alarm wires and the cut ends of the wire. The insulation of the joint should be carried out using heat shrinkable tubing of the same tape.
Installation of car alarms on the example of the VAZ 2110
Installation of car alarms in the car VAZ 2110 can be divided into 2 levels: the installation of all elements of the alarm system and the connection to the electrical circuit of the car. The most time-consuming work, perhaps, can be called the installation of electrical wiring in the doors and trunk of the car.
-
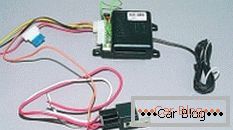
- This is how the central alarm unit with wires connected to it looks like.
-
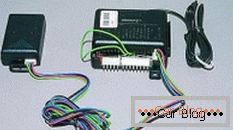
- This is a shock sensor (shock sensor) connected to the central alarm unit
-

- This is how the wiring harness connected to the unit, leading to the sensors of opening / closing of the trunk and hood, car doors, as well as sirens and lighting equipment, looks like
-
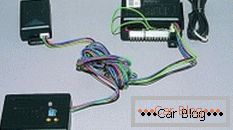
- If there is only one block on the central unit of your chosen alarm, and you need to connect two sensors, we make the connection in parallel
The process of installing an alarm on the car VAZ 2110
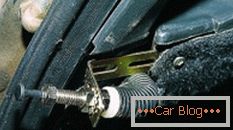
- The hood and trunk opening sensors are mounted so that a short to ground occurs at the very beginning of the opening.
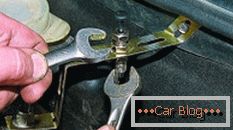
- To install the hood opening sensor, do an additional mount. To do this, use the mounting plate of the electric door lock.
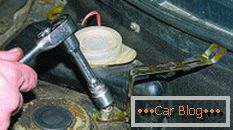
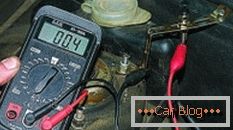
- After fixing the bracket, insert the sensor into it, adjust its height and fix it in the selected position using the bottom nut. Armed with an ohmmeter, we check how securely the sensor is connected to the "mass".
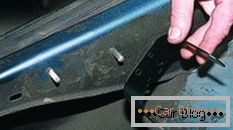
- Similarly, installing the sensor for the trunk.
- As practice has shown, the siren is best mounted under the hood on the connector of the right mudguard. Do not forget that it is better to direct the horn down to prevent moisture from entering it.
- We fix the shock sensor (shock sensor) under the dashboard with self-tapping screws.
- The microwave sensor is best placed in the center of the vehicle. Good for this purpose suitable installation instead of the standard rear ashtray. The ashtray must be removed, remove its holder and install the sensor in it. Sensor wiring is laid in the lining of the central tunnel. The sensor mount must be reliable so that it can perceive all body vibrations well.
- The central unit is installed behind the injection controller.
- The last stage is the installation of the pager transmitter. On the skim windscreen we attach the sensor, after removing the film from it. The wiring from the sensor hides under the lining of the windshield pillar.
-
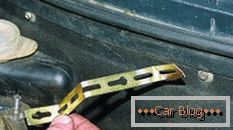
- The bracket is made of a plate mounting the drive door lock
-
- Fix the bracket
-
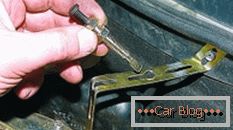
- Insert the sensor into the bracket
-
- Fix the sensor
-
- Check how securely the sensor is connected to the "mass" with an ohmmeter
-
- Similarly, install the trunk opening sensor
-
- Siren is best mounted under the hood on the connector of the right mudguard
-
- Remove the ashtray
-
- Install the microwave sensor in the ashtray holder
-
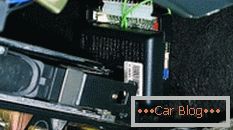
- The central unit can be installed behind the injection controller.
-
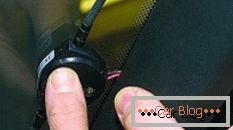
- Attach pager transmitter to windshield
Connect the wiring in accordance with the scheme attached to your chosen alarm.
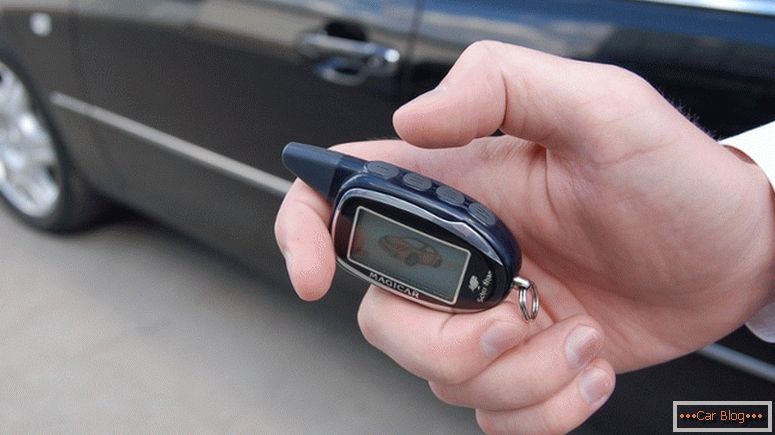
Check
Installed car alarm is checked in all modes of operation, customizable. When checking you need to consistently open all the doors, trunk and hood. When each element is opened, the security alarm should be triggered, and the engine should be blocked when attempting an unauthorized start. You also need to adjust the sensitivity of the shock sensor. To do this, in its case there are holes in which small bolts for a cross-head screwdriver are visible. As you can see, it takes time, a simple tool and a little courage to set up an alarm yourself.
Let's sum up
- Wiring should be carried out as inconspicuously as possible; existing harnesses can be used;
- The siren is installed in the most inaccessible place;
- Wires should not be under constant voltage, it can cause a fire;
- When the engine lock is triggered, an error should not appear on the instrument panel; it is easy to detect a blocked circuit.


