Before the popular injection system began to be used in gasoline engines, the carburetor was the main unit for creating the fuel mixture. On how it is set up and how the carburetor is adjusted, fuel consumption, steady engine operation at idle, the durability of the entire fuel system, and the environmental parameters of the engine depend on it.
Since there are still a lot of domestic cars with such a fuel formation system on our roads, the relevance of these adjustments is not reduced. For foreign cars, the adjustment algorithm will be similar, because the circuit diagrams of these nodes for different car models are quite close.
Content
- 1 The principle of the carburetor and care for him
- 2 Possible malfunctions
- 3 Preliminary preparation and cleaning of the carburetor
- 4 Adjustment of the float mechanism
- 5 Adjusting the fuel supply
- 6 Carburetor setting
- 7 Screen filter check
- 8 Conclusion
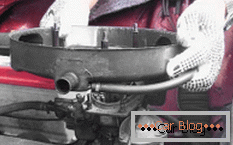
The principle of the carburetor and care for him
The carburetor is part of the fuel system of a gasoline engine. In it, the air is mixed with the fuel in a given proportion of settings and is fed into the combustion chambers of the car. There, the mixture is ignited using car candles and pushes the pistons mounted on the crankshaft. The cycle is repeated, and thus the energy of the explosion is converted into rotational motion transmitted to the wheels through the transmission.
Proper adjustment of the carburetor makes it possible to deliver a quality mixture to the chamber.
Incorrect proportions lead to detonations, which contribute to the rapid deterioration of the fuel system elements, inability to ignite, incomplete burnout of gasoline during engine cycles, and, accordingly, excessive fuel consumption.

Daily monitoring, tuning and cleaning the carburetor does not require. Most often, the unit is subjected to such a procedure on demand after using low-quality fuel or with obvious signs of unstable operation of the engine. You can carry out preventive cleaning or washing after 5-7 thousand kilometers.
Possible problems
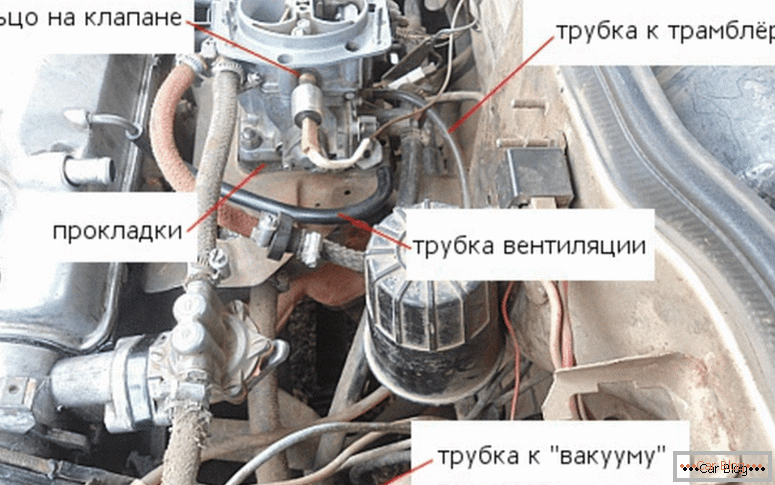
You can begin to diagnose problems with the carburetor when identifying obvious problems. Most often, the driver may notice fuel leaks. In this case, you need to check the level of fuel pressure. This can be done either at home with a fuel gauge, or at the station for 200-300 rubles. At home, it is desirable to take care of fire safety, and not to spray gasoline in the engine compartment. The value should be at the level of 0.2 - 0.3 atm. The exact parameter can be found in the instruction manual. With satisfactory readings, the problem may lie in the float chamber.
-
- Step 1. Remove the air intake cover
-
- Step 2. Adjust the jets
-
- Step 3. Set up traction
Control свечей зажигания должен выявить неправильную настройку. Если на них есть нагар с явным запахом бензина, то это говорит о неотрегулированном поплавке или прогоревшем клапане.
Stability of work at idle can be reduced not only because of the work of the carburetor, but also because of the work of the cable connecting the thrust on the carburetor with the gas pedal. It is easy to identify, simply unplug the cable from the thrust and turn the throttle without it. If there are no problems with the fuel, the reason may be in the transfer of force from the pedal.
See also: How to drain gas from a tankPreliminary preparation and cleaning of the carburetor
Before adjusting the carburetor, it is necessary to wash and clean it. For this there are special liquids.
Do not use oily liquids to wash the carburetor.
To clean the nozzles using soft copper wire. Do not use steel needles for this operation to prevent damage to the hole.
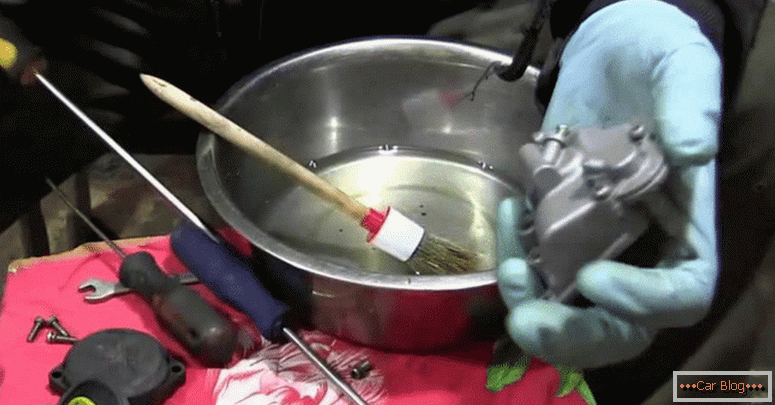
Proper carburetor washing
Also, you can not wash it with a cloth that can leave a pile on the product. In the future, such residues are capable of clogging in the bore holes and create problems during the operation of the unit.
Nagar and dirt are well washed off using aerosol dispensers, which are sold in car dealerships. To maximize the removal of dirt, wash the product twice.
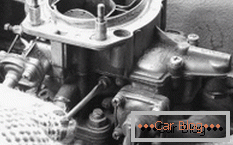
Adjustment of the performance of the float mechanism
The level in the float chamber affects the quality of the fuel mixture. When it is increased, an enriched mixture will be supplied to the system, which will increase the consumption of gasoline and add toxicity, but will not add any dynamic qualities to the car.
Without testing the performance of this site will not work properly adjust the carburetor.
The procedure includes the following operations:
- Control float positions in relation to the walls and lid of the chamber. This eliminates the possible deformation of the bracket, fixing the float, helping him to dive evenly. This is done manually, setting the bracket in a balanced state relative to the body.
- It is necessary to adjust when needle valve will be closed. Set the lid vertically, remove the float, and slightly screw the bracket tongue down with a screwdriver. With its help the locking needle moves. It will be necessary to install a small gap of 8 ± 0.5 mm in size between the float and the cap gasket. If the ball is recessed, the gap should remain no more than 2 mm.
- Process adjustment with the valve open starts when the float is retracted. Then the distance between it and the needle should be 15 mm.
Adjusting the fuel supply
You can adjust the enrichment or depletion of the fuel mixture by adjusting the appropriate nozzles, turn the control screws. If no one has made any adjustments to you with these screws, then they will have a factory-made plastic press-on. Its task is to leave the factory setting on the device, although it allows you to turn the screws to adjust to a small angle (angle from 50 to 90 degrees).
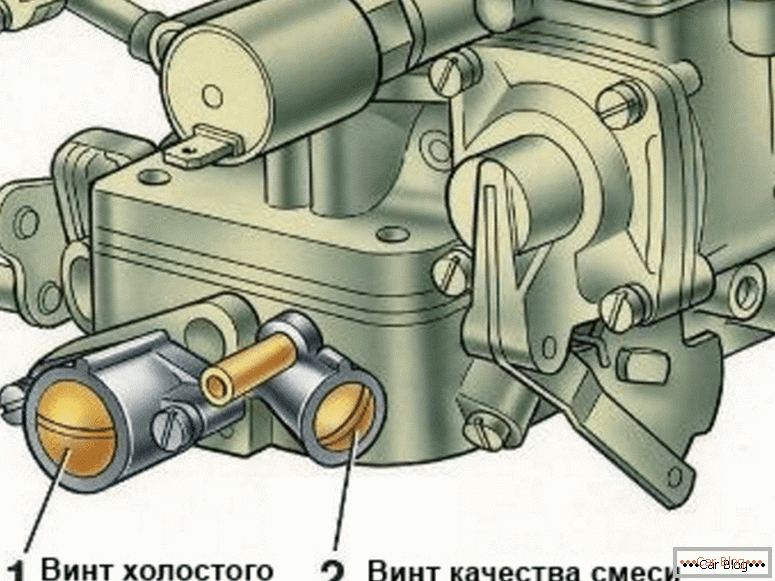
Often they are simply broken out in those situations when turning to the allowed angle does not bring results. Before this type of adjustment is required to warm up the engine to operating temperatures.
To adjust the screws tighten the quantity and quality of the mixture until it stops, but do not tighten with force. Next, unscrew each of them a couple of turns back. We start the engine and start alternately reducing the quality and quantity of fuel supplied until a stable engine is established. It will be heard that the engine runs smoothly without excessive “tearing” or rotation occurs quietly on the non-depleted mixture.
See also: Cleaning the carburetor with your own handsThe correct speed for the "classic" VAZ is 800-900 r / min. It is adjusted using the “quantity” screw. Screw "quality" set the level of CO concentration in the range of 0.5-1.2%.
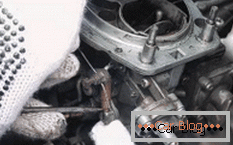
Carburetor setting
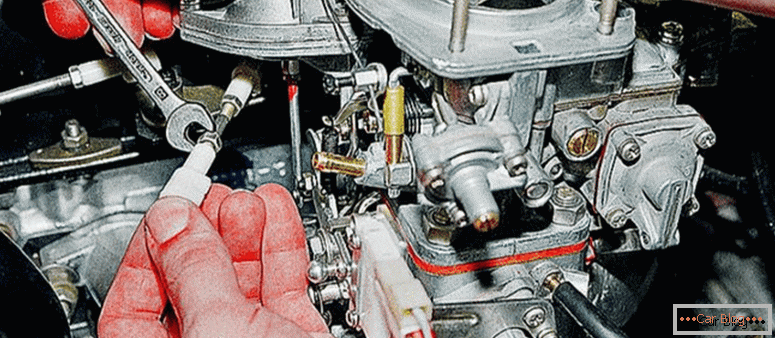
Adjustment начинается со снятия крышки с воздушного фильтра, которая блокирует доступ для работы. С помощью штангенциркуля проверяем табличное заводское значение между наконечниками тяг. Оно должно быть 80 мм. Чтобы отрегулировать длину тяги, ослабляем зажим ее при помощи отвертки. Ключом на 8 ослабляем контргайку и меняем длину, вращая наконечник.
After that, we fix all fasteners and fasten the craving in its nest. By pressing the "gas" pedal we reveal the degree of opening of the throttle. If it turns not to the end, then it is necessary to eliminate the identified power reserve. This will require reducing the length of the thrust. We get it, and with the help of a lock-nut we reduce dimensions. Put the traction in its place and conduct the test with the accelerator pedal pressed again.
Adjustment
It should also be borne in mind that in the normal state the flap should be completely closed. To increase the length of the thrust by loosening the cable.
Screen filter check
Before this operation, it is necessary to pump fuel into the float chamber. This will provide an opportunity to evaluate the closure of the check valve. Next, you need to move the cover on the filter and dismantle the valve. It is advisable to clean it in a bath with a solvent, and then dry it with a compressor.
The incorrect operation of the engine, frequent failures and unreasonable loss of power can be blamed for poor fuel supply. This is also noticeable with inadequate response of the engine to pressing the gas pedal.
At the same time, you can check the tightness of the locking needle. The operation is performed by a medical rubber bulb. The pressure it gives is comparable to the level that the fuel pump produces. When installing the carburetor cover back, the float should be in the upper position. Resistance should be heard during this operation. At the same time, you should listen to air leaks, if they do, you will need to change the needle.
Conclusion
Virtually all carburetor settings can be done at home with a minimum set of tools. During the disassembly of the unit, it is necessary to remember which parts where you were in order to return them. It is impossible to clean jets with steel needles. Quickly dry the carburetor after rinsing by using compressed air from a compressor or an automotive pump. Blowing nozzles from contamination is recommended in the same way.


