A knock at the front of the car may indicate a suspension failure. This indicates the deterioration or simultaneous breakage of its individual elements. Most often, you may need to replace the stabilizer on one or both sides. At the same time, it is more likely that the sleeves are also worn out and need to be updated.
It is not worth to postpone the revealed defects, since riding with such a problem leads to further imbalance of the remaining elements. Repair or replacement can be carried out independently in the garage in the presence of improvised tools.
Content
- 1 Functional check
- 2 Performing diagnostic work
- 3 Stabilizer Rack Replacement Algorithm
- 4 Conclusion
Health check
When driving off-road or on uneven roads, stabilizer bars, connected directly to the stabilizer, are engaged in the cancellation of translational vibrations. Fixation in the design of the suspension of these racks is carried out using structural lugs. Most manufacturers of automotive components lays the resource of such an element at the level of 100-120 thousand km, but on our roads it can not reach even 30-40 thousand km.
Before you change the stabilizer, you need to familiarize yourself with their design and function. Among the details of the suspension there are no major or minor elements, since they are all interconnected. If one element breaks down, the integrity of the rest will immediately be compromised. And with the repair of the suspension can not be tightened, because it directly affects the driving safety.
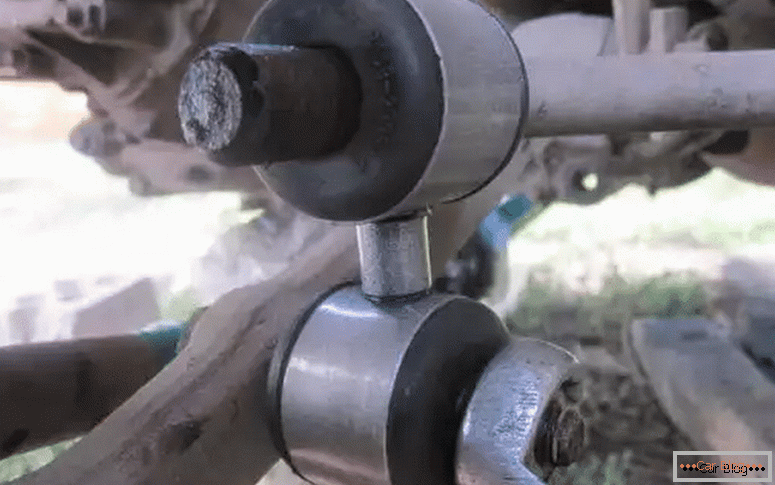
The basis for stabilization is a thrust that can withstand torsion loads, but due to its spring properties, it returns to the position specified by the designers. It is also called torsion. The fastening of this element may vary depending on different models. Sometimes the foundation is a suspension strut, and sometimes fixation occurs on the steering knuckle.
The design of the (torsion bars) also varies from the desire of engineers to ensure the stability of the car. There are one-piece and twin thrust, consisting of a pair of shafts securely connected together.
See also: How to check the strut strutThe difference in the design of racks can also be noticed. In foreign cars, these parts are longer than in domestic cars. Also, our racks are deployed mounts axes at 90 degrees.
Diagnostic work
The length of the racks from our cars is up to about 25 cm. Their ends contain a hinge, providing a flexible connection. Thus, the rack performs a damping role, taking on a substantial proportion of the torsion moment from the stabilizer.
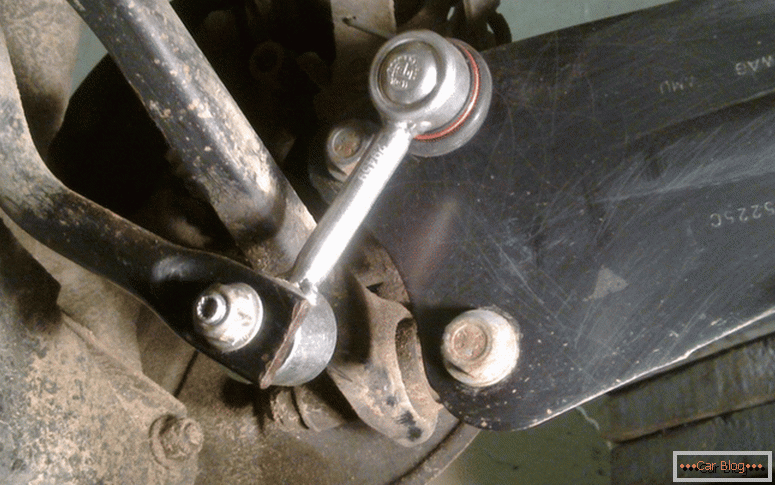
You need to know that the destruction of the rubber anther very quickly leads to wear of the connection rods, so you need to periodically conduct a visual inspection of this site.
There are clear signs that need to be replaced after:
- knocking regularly while driving on poorly paved roads;
- there was a clear roll on arrival at the turn;
- stability is reduced, the driver is forced to constantly adjust the direction of movement;
- the vehicle is swinging with a greater amplitude during braking or another maneuver, but the suspension struts are intact.
Often, such signs are visible even when viewing a recording from a DVR. For greater confidence, you can raise the controversial side of the jack and check the backlash on the wheel, swinging right / left.
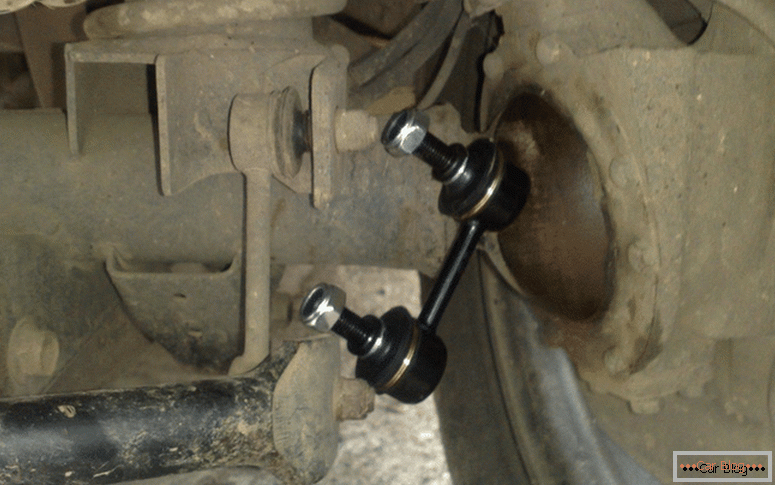
Signs of onset of damage may be cracked boot with flowing lubricant from under it. Sometimes car owners are less expensive, buying only a repair kit, which includes the boot itself, a new finger and cuff. Work in this case will be less, and the replacement of the front struts of the stabilizer may not be needed.
Stabilizer Rack Replacement Algorithm
The procedure will require a small set of tools and spare parts:
- set of racks and bushings for replacement;
- трехетку с храповиком;
- a set of open-end wrenches and heads for the ratchet;
- 0.5 kg mallet or hammer and spacer;
- rust solvent and clean rags.
This operation is divided into two parts: the removal of worn parts and the installation of new parts.
See also: How to replace silent blocksBefore replacing the stabilizer, put the car on the handbrake. We fix the rear wheels with the help of shoes. We unscrew the fasteners of the wheel, raise the necessary side with the help of a jack and, having removed the wheel, open access to the repair zone. We inspect the threaded fasteners. Often it is required to treat these compounds with anti-corrosion fluids, such as WD-40. After waiting a few minutes, the thread will succumb.
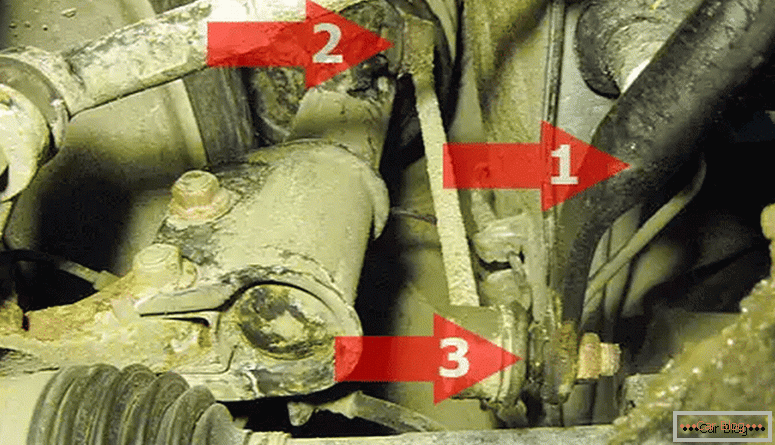
We begin to unwind from the bottom nut, then twist the upper fastener. Next, knock the hammer or hammer with bolts from the brackets. This is done carefully so as not to knock down the thread. If this happens, the coils can be corrected with a die. We get a worn detail. We put a new spare part on the vacant space and fix the fasteners. The final tightening of the nuts is made only when the car is safely on the ground. The tension force is desirable to control with a torque wrench. If necessary, the operation is performed from the second side in the same sequence.
Conclusion
Replacing the front struts of the stabilizer can be done independently, even in garage conditions. A small set of tools, which is in any car owner, enough for work. It is not necessary to control camber / convergence after replacement, as these elements do not affect this auto parameter.


