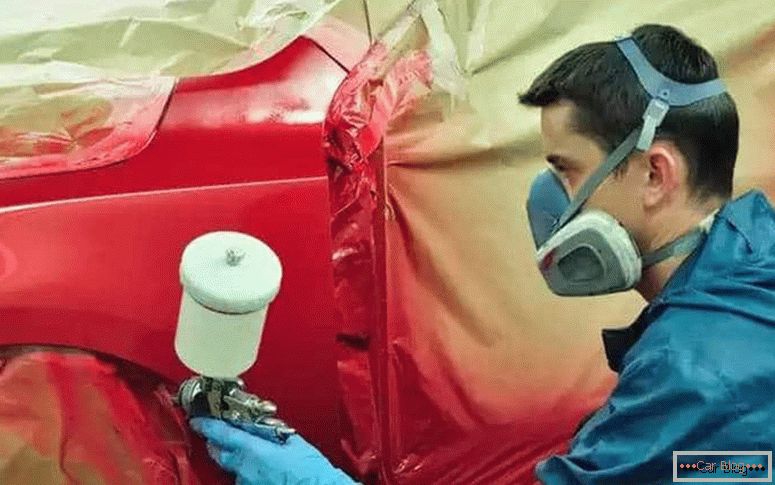
It is possible to carry out high-quality painting of the car in garage conditions. To do this, you need to arrange a convenient spray booth, as well as be equipped with the necessary tools. Buying expensive equipment for many car owners is too expensive, so you have to make a compressor for painting a car with your own hands. This operation is much cheaper.
For competent manufacturing of this device you will need to familiarize yourself with the theoretical part. Due to such preparation, in the course of the subsequent work, it will be possible to avoid the appearance on the painted surface of grit, shagreen or dust particles mixed with paint.
Content
- 1 The most simple design
- 2 Advanced compressor
- 3 General assembly of the structure
- 4 Pressure monitoring
- 5 Budget version of the compressor
The most simple design
The work of almost any factory or homemade compressor is based on the same principle. In a sealed cavity, an elevated pressure is formed, which is higher than atmospheric, and then it is directed and metered.
Apply mechanical or manual method for injection. In the second case, energy saving is obtained, as well as independence from the presence of electricity supply points near the working area. In the case of automatic air supply to the working cylinder, it will be necessary to control the availability of oil for the air compressor.
Before you make the compressor for painting the car, we will prepare the tools. There is a way in which the work item is a car camera. To do this, select the components in the list:
- working chamber from a car or truck;
- a pump having a built-in pressure gauge for pressurizing;
- additional nipple for the camera;
- hard awl;
- repair kit for sealing the camera.
Pre-check the tightness of the selected chamber. To do this, it is pumped and immersed in water. If leaks are detected, we will definitely get rid of them.
We plan in the free space the point where the installation of the second nipple is supposed. In this place we make an awl a hole. The fitting must be glued with a repair kit. Through it will ensure a uniform flow of air.
The initial nipple built into the chamber is necessary to maintain the working pressure at the required level. The efficiency of the installation is determined by the final result. When the paint is evenly spaced, this indicates proper assembly and sufficient pressure in the tank. Select the desired parameter will help the pressure gauge built into the pump.
When such a homemade compressor works to paint a car, you need to try to prevent moisture and small debris from getting inside the cavity.
This will ensure maximum cleanliness of the painted surface. It is also advisable not to allow condensate to form inside the chamber.
Advanced compressor
With proper assembly and regular maintenance of the device, a homemade compressor can last much longer than the factory. With all this, it is unlimited in repair parts, and can also be periodically improved and refined.
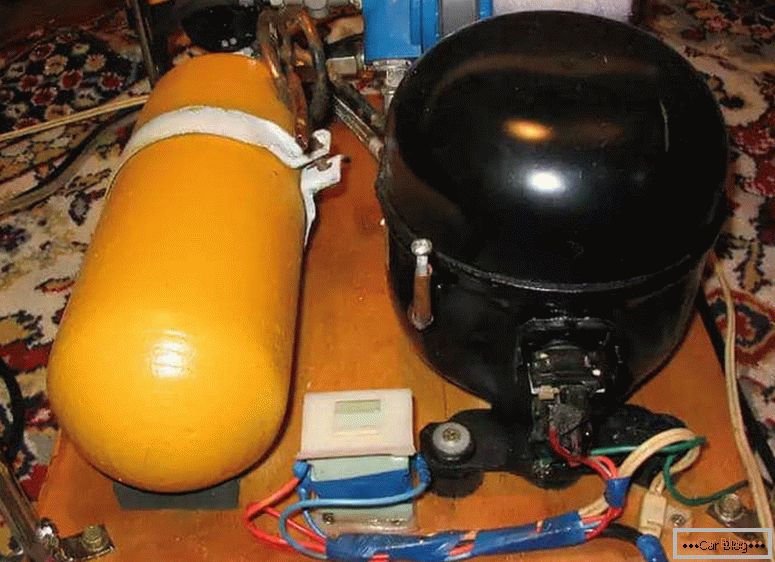
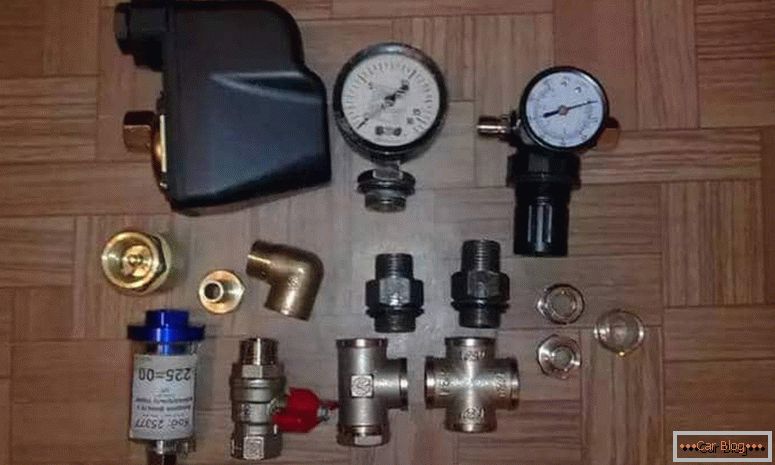
The basis for a more progressive model are the elements of the old refrigerator:
- receiver under the compressor;
- pressure gauge at 10 atm;
- a relay that controls the pressure inside the compressor;
- pipe thread adapters;
- gasoline cleaning filter;
- gearbox protected from moisture and oil filter;
- cross piece with вод inch thread;
- electric motor for compressor operation;
- hydraulic hose clamps;
- semi-synthetic oil;
- oil resistant hose;
- copper tubes;
- medical syringe;
- wooden stove;
- rust remover;
- power system filter;
- hardware elements;
- furniture wheels;
- sealant, sealing tape;
- small file or metal saw;
- electric switch (220 V).
The advantage of earlier models of refrigerators is the presence of a starting relay. Also positive is quite powerful pressure, which develops the compressor. Using the rust converter, we clear problem areas on the body and work items of the prepared assembly.
See also: Coating raptor for cars: what is itIt is advisable to carry out a small maintenance of the compressor, replacing it with semi-synthetic oil. In modern oils, a sufficient amount of additives to ensure long compressor operation. In its design there are three nozzles, one of which is hermetically closed. In the other two air will be circulated. To determine the direction of flow will need to connect the machine to the mains.
The sealed pipe hides oil in the pile. Having bitten off with nippers or having sawed off its end with a file so that chips do not get into the cavity, carefully pour the liquid into the prepared container. This will determine the required amount of oil for replacement. It is necessary to pour it with the help of a syringe the same volume that was removed through a tube.
After topping, plug the hole with a screw or a screw that is wrapped around the threads with sealing tape. Now begins the installation of the whole structure on a wooden base or a welded frame of the construction profile. Compressors from refrigerators are sensitive enough to position in space. To determine it on the body there is a special arrow. On this depends the correct performance of the entire site.
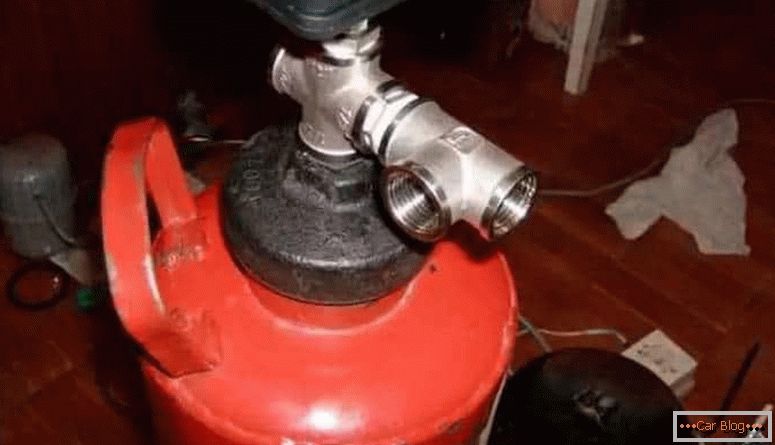
A regular foam or powder fire extinguisher is suitable as an air tank. It is advisable to select it so that the cavity was at least 10 ... 12 liters. Usually they are checked for pressure holding up to 15 ... 20 MPa. To release the cavity, unscrew the adapter with the locking-starting device.
If on the surface there are areas with corrosion, then it is necessary to eliminate them., preventing rust from spreading, leading to end-to-end damage. Such phenomena are unacceptable, as they contribute to the depressurization of the container.
Inside the cavity you can pour the rust converter and shake well, and then pour and dry. Outside fasten plumbing cross.
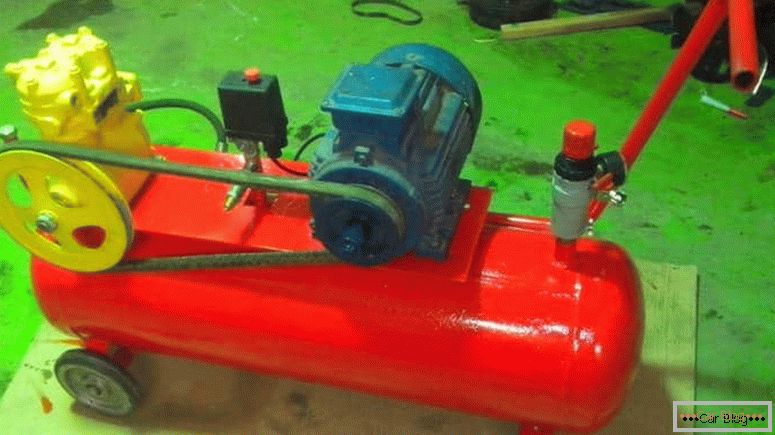
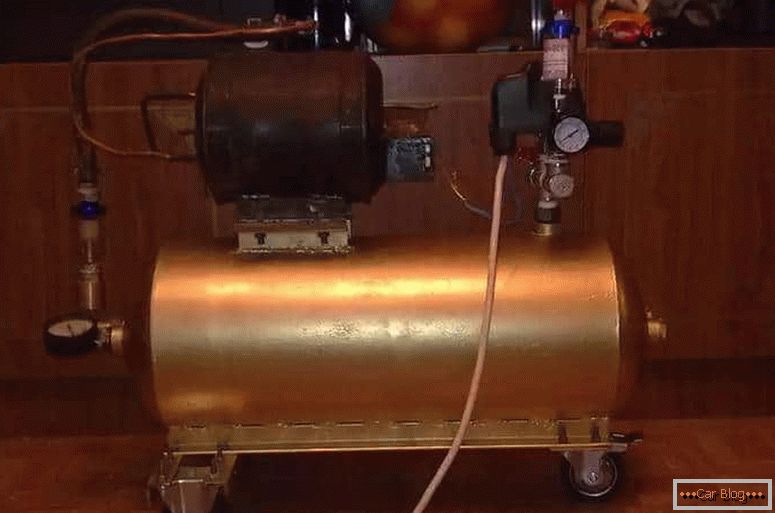
General assembly of the structure
The most convenient option would be to arrange all parts on a wooden base. For installation, drilling of holes and fixation of elements using bolts and nuts are used. You can also use a sheet of plywood, to which everything is easily attached with screws. On the lower plate or frame for greater mobility set moving on 360 wheels.
Gasoline coarse filters will help provide adequate protection against the ingress of fine dirt or moisture. They are usually mounted on the side of the air intake. On this side, an inlet tube is placed, which can be held even without clamps, since there is no high pressure in this place.
On the downstream side, you also need to install a protective filter that will prevent the air flow from moisture and oil particles from the compressor. As such a blocker use fuel filters. Without clamps such a node will not stand.
In the output crosspiece we install an adjustment relay, as well as a pressure gauge for pressure control. Free plug connect with gear. With the help of the relay it will be possible to adjust the pressure height range in the receiver.
As the actuating mechanism used PM5 (RDM5). Initially it was used in plumbing systems, but since it is a two-contact switch, it will work in our case. One contact goes to the connection with the supercharger, and the second to the "zero" network of 220 V.
Using the toggle switch, we connect the network phase. It will help quickly if necessary, turn off the power supply, so as not to run to the outlet for this.
See also: How to remove stickers from the carPressure monitoring
Having collected all the elements together, we need to check the operation of the mechanism. To do this, we connect the device to the mains, and the relay is set to the minimum pressure supply. Monitor the readings of the gauge while the system is running.
After checking the relay, you will need to identify possible places of leakage. For this operation, a prepared soap solution is used. It is made thick in the form of gruel. We coat problem areas with a solution while the compressor is running. If air bubbles appear, close the leak.
During a possible pressure drop to critical values, it is possible to install additional air pumping with the compressor on. After receiving positive results during the test, you can proceed to painting.
Satisfactory pressure for system operation is selected empirically. In this situation, it is necessary to select the settings so that everything happens at the minimum values of the blower actuating. With this design it is possible to paint any surface.
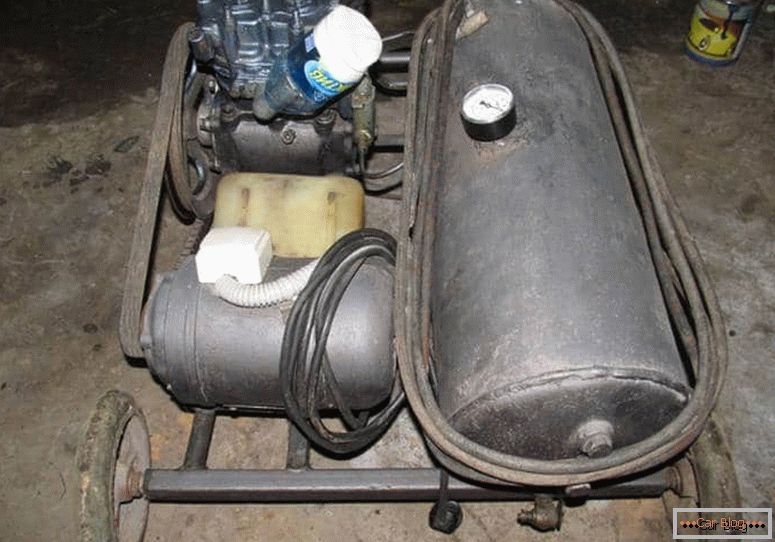
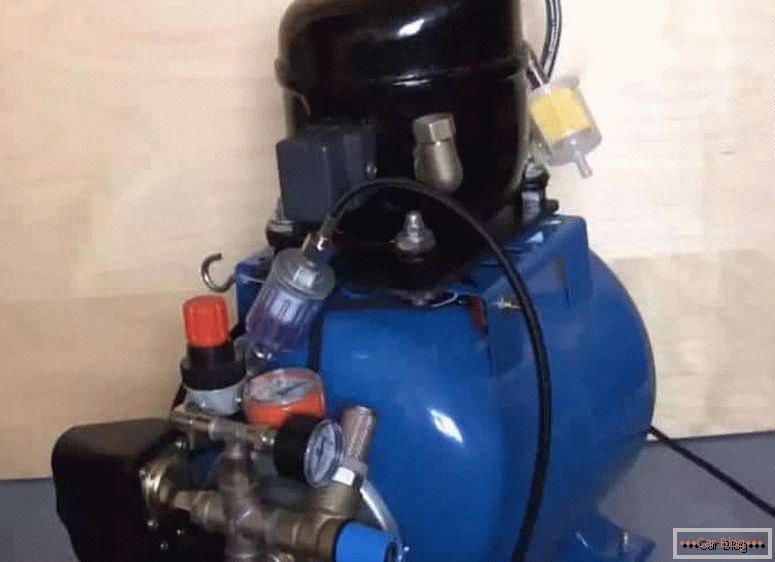
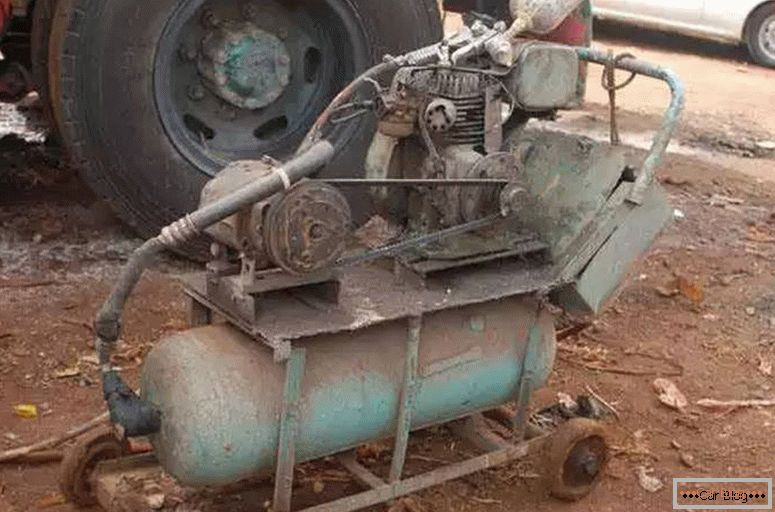
Budget version of the compressor
Creating a compressor for painting can be quite economical. It is also possible to use elements from the old refrigerator as the basis, and any airtight cavity is usually used for a container with air:
- The developed oxygen cylinder. It is able to withstand high pressure parameters, but has the disadvantage of a large mass.
- Propane cylinder. Possesses the same positive qualities as oxygen.
- Fire extinguisher. Models with a volume of 10 liters or more will be suitable, as they have the best ability to withstand high pressure. However, at the exit they have a metric thread.
- Hydroaccumulator. The cavity has a good volume with sufficient working pressure. It requires certain modifications to get rid of the membrane and the metric thread.
In the next step, combine the receiver with the compressor. It is necessary to provide for maximum compatibility of connectors for connecting a relay capable of turning off the compressor at the right time. You can also use RDM-5.
The pressure gauge is selected with a maximum value of 10 atm. Fittings, tees or corners are selected with an inch thread. This will facilitate the assembly and ensure maximum air passage through the channels. To accommodate the design is allowed to use chipboard.
As a result, the list of necessary elements will be in this configuration:
- Prepared compressor;
- Receiver for the distribution of air flow;
- Pressure switch connected to the network;
- Pressure gauge up to 10 atm;
- Filter gear;
- Emergency release valve;
- Transitional threaded elements;
- Sealing elements (tape, paste, etc.);
- Wiring, plugs and on / off elements;
- The hose protecting from moisture and oil;
- Chipboard;
- Hardware elements, wheels, gaskets.
If you are afraid of the number of parts and the complexity of manufacturing, you can always buy an inexpensive factory-made compressor.
Installation of the receiver in the form of a hydroaccumulator will be the simplest, since it is already equipped with the necessary brackets. They can also be used to mount the compressor on top. Get a two-tier design.
As fasteners, it is desirable to use bolts with nuts, passed through pre-drilled holes. This will ensure greater stability of the structure.
To reduce the effect of vibrations will be possible in the presence of rubber / silicone pads that are used as damping.
With the help of prepared flexible tubes we connect the compressor output and the entrance to the receiver. Be sure to put the protective mechanisms in the form of filters. Power is supplied to the switch and relay. The construction must be grounded.


