Proper operation of the gas distribution mechanism affects fuel consumption, the performance of adjacent components and the overall life of car parts. To do this, the car is setting up the system, including the adjustment of the valve clearances. Such an operation at the station is not cheap, because it requires not only time and skill, but also knowledge with experience.
Not all modern foreign cars need this operation. Automakers went the way of installation in cars hydropomp, helping to automate the thermal gap. But in this case, the reliability of the system as a whole decreases, and also the maintainability of the unit is reduced to almost zero. But, for example, Honda did not remove the stop screw with a nut from the design, moreover, the installation from the factory does not change almost 100 thousand kilometers.
Content
- 1 Basic principles of adjustment
- 2 How are valves being adjusted
- 3 The sequence of settings for the VAZ 2106
- 4 Adjustment for VAZ 2109
Basic principles of adjustment
In order to get the correct result, it is necessary not only to know how to adjust the valve in the gaps, but also to comply with the conditions under which this process takes place on almost any car.
Work is performed on the cooled engine. The recommended temperature range is from 15 to 25 degrees.
In this mode, measurements will be as objective as possible. Some experts do this work on a hotter car, but allow a small correction for temperature. This option is undesirable for beginners.
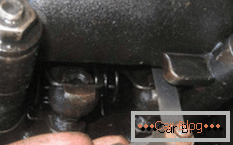
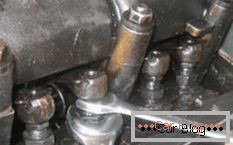
Clearance Adjustment
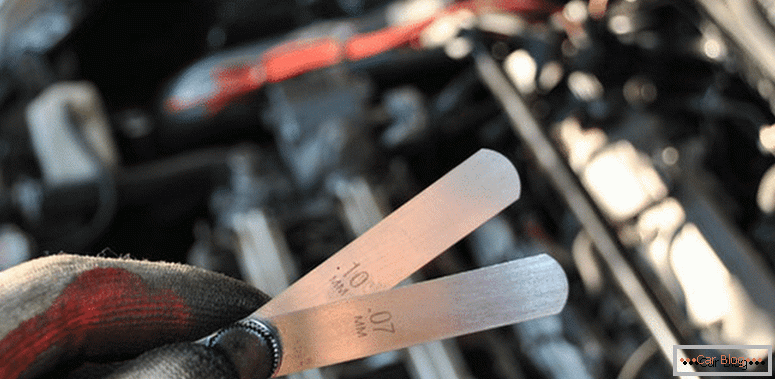
Most often, the gap is adjusted under the screw, and for such an operation it is possible to get along with a set of probes having a width of 10 mm. But, for example, it is desirable to check classic vases with wider sets. Since a narrow probe can give a small error.
You need to know that on the Lada cars from the “first” to the “seventh” models, the designers installed thermal valve clearances of 0.15 mm, the same on the intake and exhaust.
For such a value, you can do with one tool, but if it is in the hands of an experienced master. After all, the impossibility to pass through the slot indicates clamping of the nut, and too free passage may indicate a large gap. However, only those who have repeatedly performed such an operation will be able to grasp the fine line between “too big” and “sufficient”.
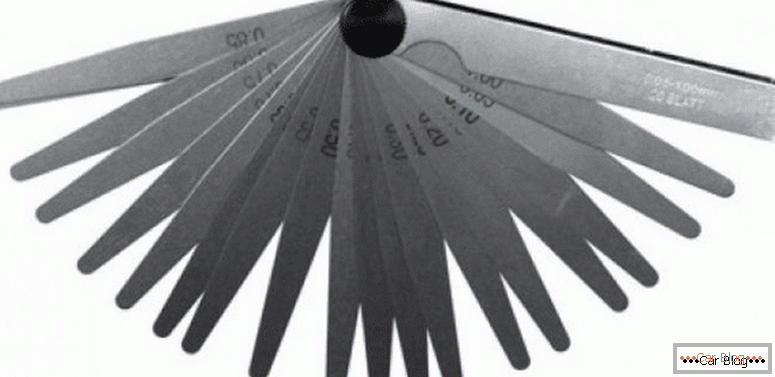
Probe Set
For beginners, a pair of probes will do. The first should be the maximum allowable thickness - “not pass”, and the second probe for adjusting the valves should have the minimum allowable thickness “pass”.
See also: How to adjust the throttleHow are valves being adjusted
Before starting the adjustment, you will need to install the piston, over which the manipulation will be carried out, to the top dead center of the compression stroke. In this position, the valves must be closed. Rockers can move freely within the gap.
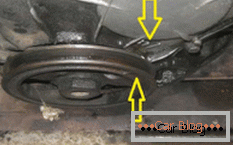
For ease of adjustment, you can use the setting of the initial position on the marks on the crankshaft pulley and camshaft.
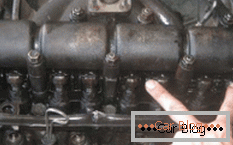
Now you need to release the locknut on the bolt or screw. Tightening or releasing the second nut for adjustment, you need to push the dipstick into the adjustable clearance under the rocker (rocker) and tighten the adjusting nut to the desired height. After setting the required clearance tighten the lock nut.
-
- Step 1. Install the crankshaft pulley by tags.
-
- Step 2. Select the desired valve to adjust
-
- Step 3. Measure the current clearance
-
- Step 4. Adjusting
You need to know that with a strong tightening of the lock nut can slightly increase the gaps. Therefore, experienced specialists slightly loosen the adjustment nut before tightening the locknut.
Now again it is necessary to check the gap in the same place. If it is unsatisfactory, then the procedure is repeated until the desired result is obtained. The gap can be called excellent when the passage of the probe is accompanied by a small effort, but without a bending tool.
You need to know that to install the crankshaft to the next position, it must be rotated strictly clockwise only by the starter handle.
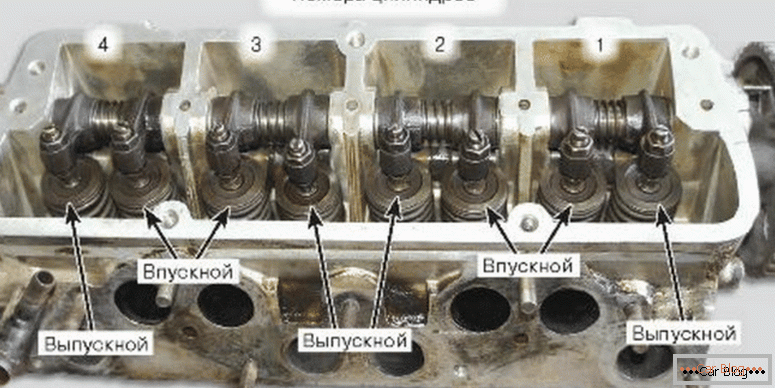
Location of cylinders and valves
It is necessary to follow the valve adjustment procedure established by the manufacturer. It may be 1-3-4-2 or other, but you need to crank the crankshaft to go to the next cylinder. On the "classic" one of his 180 turn corresponds to a camshaft rotation of 90.
The sequence of settings for the VAZ 2106
As an example, take the classic model of VAZ. After installing the tags from the pulleys opposite the control points, the adjustment of the valves is carried out in strict sequence. In the initial position, you need to adjust the gaps in the 6 and 8 valves.
See also: How to check the camshaft sensorTurning the crankshaft 180 , in the upper position will be available 4 and 7th. Adding 180 more , it will turn out a full turn of the crankshaft and the 1st and 3rd positions will be in the adjustment position. Scrolling crankshaft another half a turn, you can put the 5th and 2nd valves.
Adjustment for VAZ 2109
The principle of determining the gaps is similar to the "classic" models. However, adjusting washers instead of screws are involved. Therefore, if the clearance is set incorrectly, it is necessary to replace the washers to adjust the valves.
Rotate the camshaft with a special tool. After installation in its desired position on the shaft, the pusher is sunk, and then we put the lock. With the help of tweezers now take out the puck. From the bottom side there will be an inscription indicating the thickness.
Put in its place the necessary thickness of the repair washer and remove the lock. After that, measure the gap again. If it is satisfactory, then go to the next valve. Otherwise, repeat the procedure with washers.
After setting the necessary parameters of the ignition system, it is necessary to assemble the mechanism in the reverse order of disassembly. It is advisable to install components and parts in their places so as not to unbalance the operation of the engine and other systems.


