To decorate their cars, someone uses spoilers or other tuning body kits. Someone like installing powerful wheels or interior decoration with high-quality sound of the audio system. Most noticeably, it turns out in those cars that have beautiful drawings on the hood or doors. The image is applied using airbrushing.
To paint the car like that, you need to buy a special sprayer. Well, craftsmen can make an airbrush with their own hands. Almost all the details for him are in any apartment.
Content
- 1 Types of airbrushes
- 2 Homemade installation
- 3 Airbrush Compressor
- 4 Receiver selection
- 5 Homemade airbrush settings
- 6 Work with a homemade airbrush
Types of airbrushes
To understand what we need as a result of the device, you need to figure out what they are. There is a division according to the method of mixing streams of paint and air:
- with external mixing the device allows you to pour large surfaces on the car; even an old vacuum cleaner is suitable as a compressor;
- with internal mixing, the streams will swirl inside the housing, which is a spray head.

Separation by flow control method:
- with a single stream, the jet is directed through one of the channels: air or colorful, while the ink consumption is reduced if the mixture goes through the air channel;
- with a double version, both channels can be adjusted, both dependent (automatic) and independent (manual) operation of the device is allowed;
- With independent feed, you can completely manually control the operation of the airbrush.
-
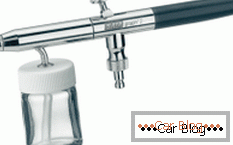
- Corporate airbrush
-
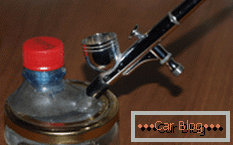
- Homemade airbrush
-
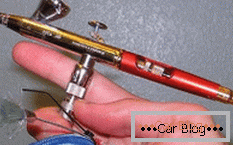
- Handmade airbrush
The division according to the method of filing colors and installation capacity:
- top supply of working fluid;
- feed bottom;
- lateral installation of the tank;
- liner paint material under pressure.
Homemade installation
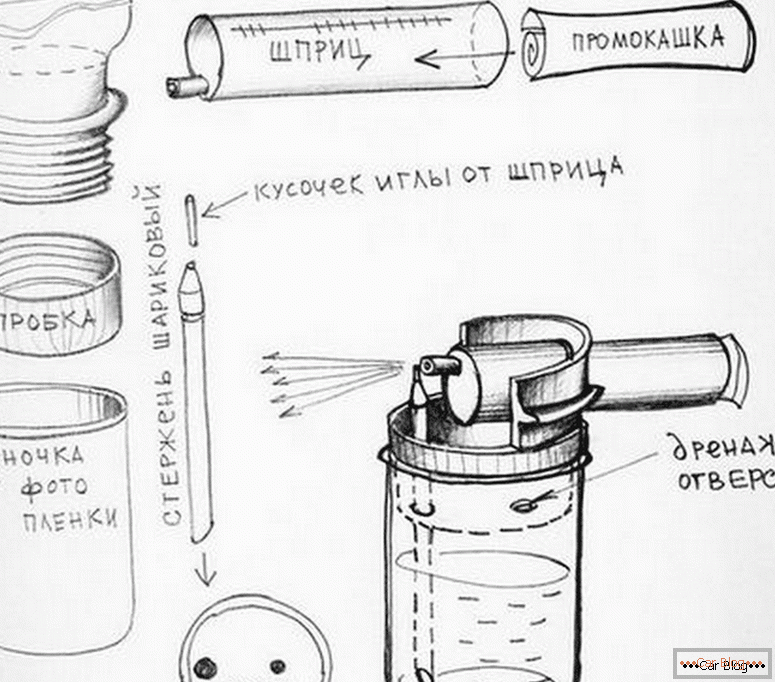
Now let's figure out how to make an airbrush yourself. Its head can be assembled even at home. It is necessary to stock up with several blanks:
- ball pen;
- cork bolt;
- paint tank.
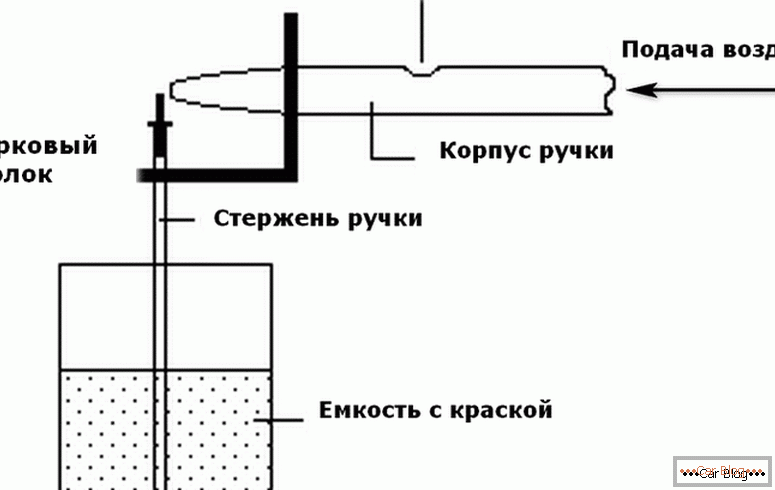
Airbrush assembly scheme
We disassemble the handle and take out the rod (ampoule). We disconnect the metal part from the rod and blow out the ink. Flush ink residues with alcohol to the transparency of the plastic tube. From the cork form the "corner".
Insert the body of the handle and the rod into the corner so that they form an angle of 90 degrees. We attach air hoses to the body of the handle, it is possible from a home-made compressor. The rod is lowered into the ink tank. Everything is adjusted experimentally.
The body of the handle is desirable to choose more durable and resistant to solvents.
For durability, it can be replaced with copper tubes. You can make a compressor for an airbrush with your own hands with the help of an old refrigerator in which the part with the same name is in working condition.
See also: Installing the grid in the trunk do it yourselfAirbrush Compressor
Disassemble the parts better than the old foreign-made refrigerator. Although domestic products are also renowned for durability, but for foreign devices, the economy is preferable and the noise level is lower.

Homemade airbrush
For the future apparatus will also need a receiver and a pressure switch. Such tricks will help get rid of the financial costs of welding and turning.
Dismantle the compressor from the refrigerator must be carefully. At the same time, it is worthwhile to avoid sawing off or biting off the tubes suitable to it, in order not to introduce unnecessary metal chips into the system. Most likely, the device will be a working relay. It is also needed for a kit in an airbrush.
Receiver selection
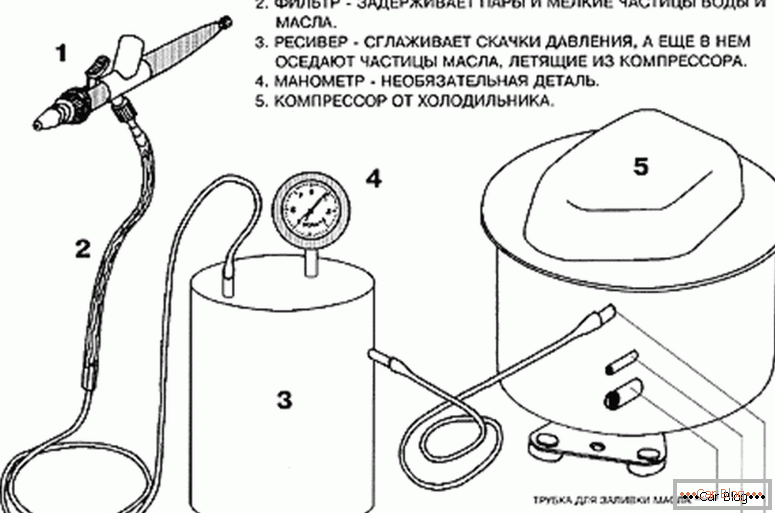
In the overall design will need to install the receiver. The best option would be a hydroaccumulator from any pump. The recommended volume for this is about 30 liters. An emergency relief valve and a pressure gauge with a pressure switch can be added to the kit for such a tank. A valve will be needed if an automatic system fails. You can set the pressure in manual mode. For this there is a special pen.
Assembly option homemade airbrush
Installation of such a kit should be carried out using pre-purchased adapters and fittings. Additionally, at the entrance to the receiver should put a check valve.
Sealing will provide high-quality clamps and oil-resistant connecting hoses. During operation, gasket sealant and fuel filters will be required. It is also desirable to update the oil in the compressor. This is done with the help of a tube, the output of which is sealed end to be opened. After replacing the pipe is again blocked with a sealant.
On a plywood sheet or slab of chipboard bolts fasten the receiver capacity, repaired compressor, starting relay and oil separator regulator. Installation of filters is carried out at the inlet, between the compressor and the receiver. A check valve is also mounted at the inlet, and below is a relay for switching on.
See also: Making dodges fiberglass do it yourselfHomemade airbrush settings
In the case of the handle there is usually a “native” hole, through which the metal part of the rod is pushed through, for an airbrush of insufficient diameter to work. It must be carefully expanded with sandpaper. Tip three hands on the abrasive part to the formation of a hole about 3 mm.

After that, in the horizontal opening of the tube, we pass the resulting tube so that the extreme plane of the housing is located above the hole of the rod. In this way will be created thrust for blowing paint.
The rod is lowered into the tank with paint should not reach the bottom.
High-quality work of the device will be in the event that there will be a small gap between the bottom and the core of the pen. If necessary, it can be shortened.
For high-quality fixation, the working part can be mounted on the lid of the paint container. This is done with the help of water-repellent glue, providing tightness and strength at the same time. As a result, the design should be tough, but adjustable.
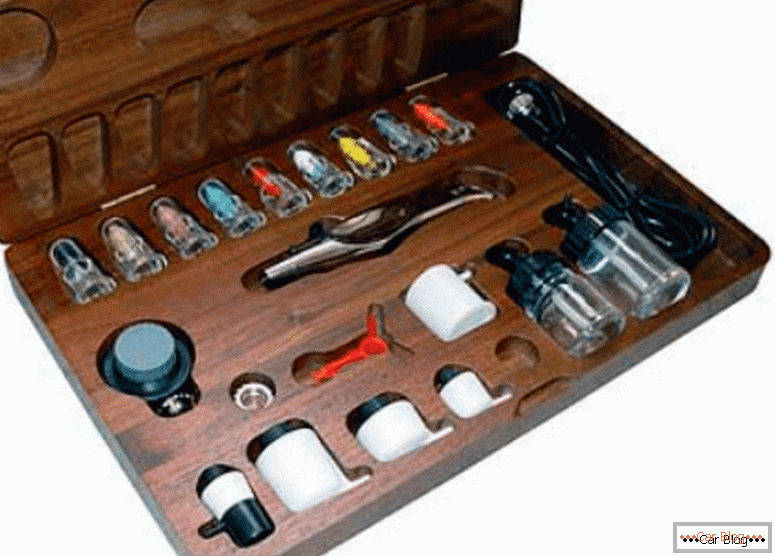
Airbrush Set
Work with a homemade airbrush
Paints must be diluted to form a thinner solution. Viscous liquid is hard to apply, quickly clogs the working tube and poorly sprayed. Concentration is selected individually for each type of paint.
For more convenient use the device can be equipped with a handle.
In homemade devices, it is often attached to a container of paint. Although the device is quite light, but with long-term work, hands may get tired, as you have to keep them almost all the time in one position.
A small bypass hole can be made at the top or side of the handle body.
Such an improvement will help not to turn off the compressor each time, but simply by covering or opening this additional hole with your finger, you can start or stop the paint supply in the system.
The work of a home-made device is unlikely to reach the level of professional devices, but it is very economical and will allow you to learn the basics of airbrushing without large financial costs. Also, all items can be replaced with breakdowns or wear with inexpensive components, which reduces the cost of maintaining a homemade device.


