Modern car is a set of systems that facilitate the life of the driver. And so that anyone could feel comfortable driving, regardless of driving experience, many devices were invented - power steering, fuel injection, navigation and parking sensors. The first reduces the force applied to the steering wheel, which allows even fragile girls to maneuver without problems. The second makes it easier to start the engine - there is no need to adjust the air supply to the fuel system by hand in cold time. And the latter help to freely maneuver in an unfamiliar place for you.
Несколько датчиков на бамперах оповещают, сколько метров или сантиметров осталось до препятствия. С его помощью вы не повредите свой автомобиль. И сегодня парктроники часто устанавливаются даже на стандартные комплектации. Но installing parking sensors do-it-yourself не вызовет трудностей, если ваша машина не оборудована им с завода.
Functions and purpose of PDC

Parktronic is an indispensable device for a driver who lives in a big city
In the modern city, the main problem is parking. Sometimes it is quite difficult to find a place where you can park your car, there are very few free sites. Even paid parking can be found infrequently. It is necessary for drivers to leave cars on the sidelines, but getting into a small gap between neighbors is problematic. It is very easy to damage your car, and the one that stands nearby. This is where parking radar comes to the rescue, which tracks the distance to the obstacle and displays it on the display in the cabin.
Focusing on the rear-view mirrors in such situations is not worth it, since they have a dead zone - a space that is not captured by any of the mirrors. But the sensor PDC is able to catch any obstacles - curbs, poles, cars. Often you can meet and parktronics, equipped with rear-view cameras. Usually they are installed near the state number or in the bumper. And inside the car is a LCD monitor, which displays the image from the camera. With this improvement, you can see everything that is located behind the machine. Today, installation of Parktronic with a similar function is most in demand, since information is provided to the driver as completely as possible.
See also: Doing a spoiler with your own handsCompletion of modern Parktronic:
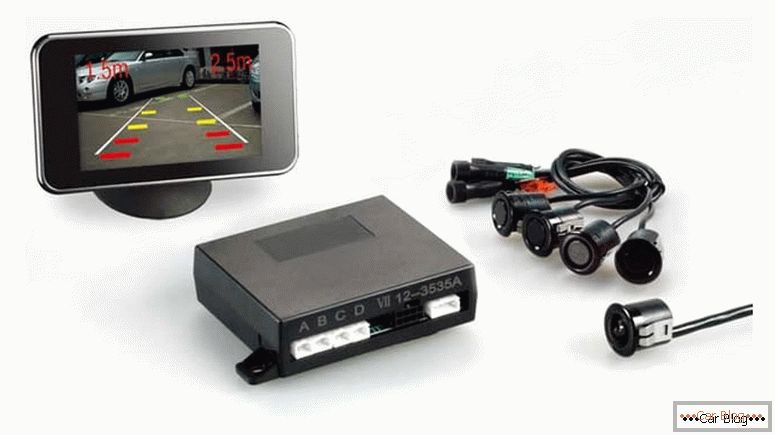
Parktronic kit with rear view camera
- Sensors. The most popular scheme is two at the front and four at the back. The more emitters you install, the more coverage you will get.
- Parktronic control unit processes signals from sensors.
- Wires, terminals, connections.
The control unit counts the time required for the signal to travel the distance from the sensor to the obstacle and back. If the signal does not return, the device understands that there is no interference. By calculating the time, the control unit makes the simplest calculation of the distance, because the radiation velocity is known and constant. Next, the output value is converted, it is presented to the driver visually - an inscription appears on the LCD display with the exact distance to the noise. But more often, of course, there is a duplication of sound - the closer the obstacle, the faster the speaker will squeak in the device, warning the driver about the danger.
Independent installation of parking sensors
Some cars can be produced without a parking detector, but there are places for installing sensors. But even if they are not there, everyone can make several holes. Complete with a parking assistant usually comes a special drill bit, the diameter of which is the same as that of the sensor. The first task that you need to solve is to choose the type and brand of device. It is necessary to take into account such moments:
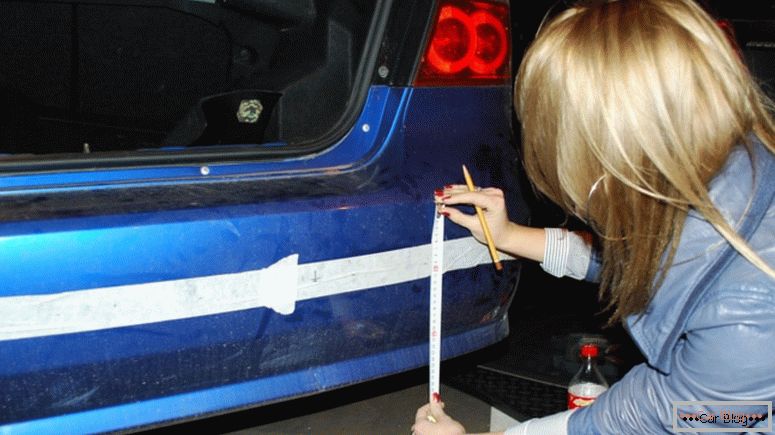
To preserve the paintwork of the bumper, it is better to paste over the insertion points of the sensors with masking tape before drilling the holes.
- your financial capabilities;
- which manufacturer you trust the most;
- device capabilities (graphic display, the presence of a video camera, sound notification).
But the most important thing is to check the information about which device models work best on your car model. Sometimes the design features of the bumpers do not allow certain types of sensors to work fully, with the result that you will have to change the location of the detectors several times to achieve the best result.
When you buy a kit, read the instructions, it tells the main points that need to be considered during installation. Be wary of looking at devices that have instructions in Chinese - you can hardly translate it. If you know English, then you can safely buy copies with the manual in this language. But more clearly, of course, will be the Russian-language manual.
See also: What is parking sensorsBefore you install the parking sensors, you must carefully study its scheme. The installation process can be divided into several stages:
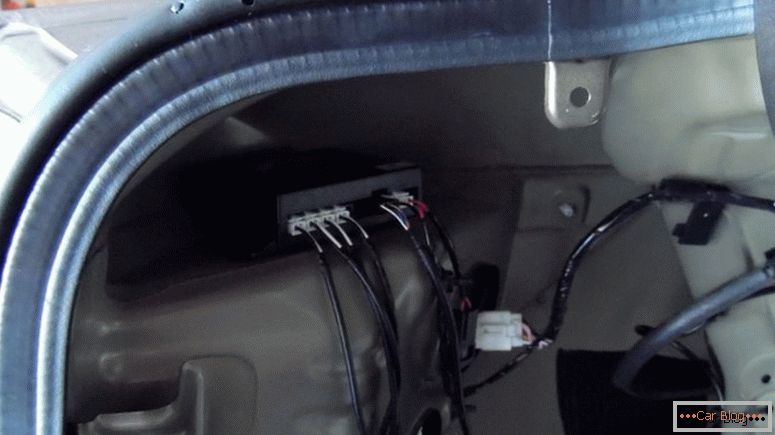
The control unit parking sensors often located in the trunk
- Place the control unit in the trunk of the car. It can be attached to the back of the rear seat. At the bottom of the trunk is better not to install, as it is possible moisture on the device.
- Mark the place to install the sensors on the bumper. Before this, of course, carefully wash the bumper to keep it as clean as possible. This will facilitate the work. Mark the position best permanent marker.
- All sensors should be located at a height of about half a meter from the ground. First, mark the position of the two extreme, which should be mounted on the rounded edges of the bumper. Measure the distance between them and divide by 3 to evenly position the other two radars.
- Using a cutter, drill holes in which you mount parking radars, fixing them with glue or sealant.
- Wire the sensors to the control unit and make the connection, focusing on the concept. From the control unit lay the wires to the monitor, located in front of the driver's eyes.
- Test the installed system.
At the testing stage, notice whether the system triggers obstacles, are there false alarms? If there are no shortcomings, then you can safely use the device.


, what to do?")