When the voltage relay breaks, problems arise in the operation of electrical equipment. The reasons that caused the failure in the voltage regulator may be many, but the most common of them is boiling of the electrolyte in the battery. The voltage regulator (PH) is beyond repair, it is simply changed to a new one. However, before you change it, you need to make sure that it is defective. You can check the generator generator relay yourself.
Content
- 1 The purpose of the current regulator in the car
- 2 Types of voltage relays and their device
- 3 External signs of breakage
- 4 Why breaks
- 5 How to check the relay-regulator without removing from the car?
- 6 Testing of the removed regulator (with the scheme)
The purpose of the current regulator in the car
В машине и в других средствах передвижения для нормального функционирования электрооборудования и других систем необходим постоянный ток -13,5–14,5 В. Если напряжение недотягивает до нормы or наоборот ее превышает, электроприборы начнут выходить из строя, а аккумуляторная батарея из-за избытка заряда сократит свой эксплуатационный срок. Реле-регулятор выступает стабorзатором этого бортового напряжения в заданных пределах, в зависимости от электрической нагрузки, частоты вращения ротора генератора и температуры окружающей среды. Он пропускает допустимое напряжение в бортовую сеть автомобиля, тем самым обеспечивая ее требуемыми параметрами.
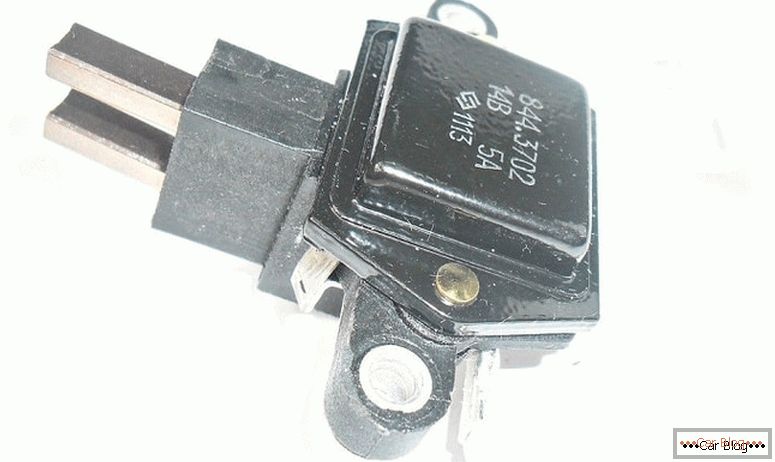
Relay-voltage regulator
Types of voltage relays and their device
If to exaggerate, then there are two types of device and they both work according to the same principle:
- отдельные or контактные. Installed on the vehicle body under the hood by means of brackets. First, the wires move away from the generator, and then go to the battery. This type is less common since it was released 30 years ago. There are also modified models that are just included in the use. Their key design elements are:
- Two blocks of resistance;
- Magnetizing coil;
- Contact Group;
- Metal core.
- совмещенные or электронные со щеточным узлом. It is mounted directly on the generator. The location of the relay in the housing with brushes.
Общее у обоих – неразборные корпуса, часто они просто залиты герметиками or особым клеем. Так как они не подлежат ремонту, то цена на них низкая. Раньше был еще один тип – совмещенный с клеммами, но большого распространения он не получил, поэтому рассказывать о них не стоит.
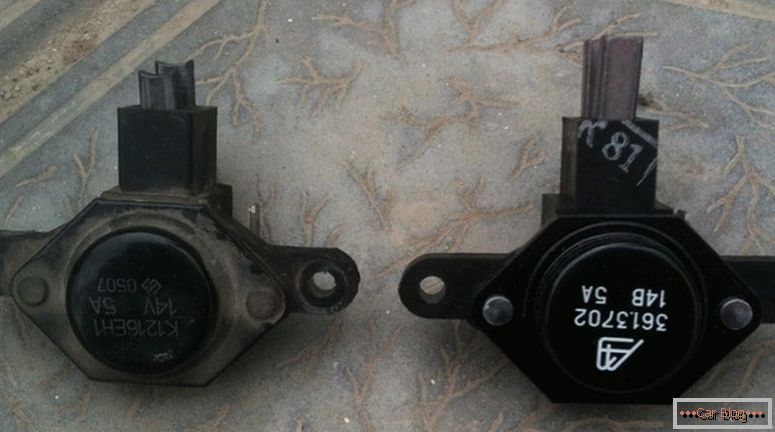
Old and new relay regulators
External signs of breakage
Signs of a faulty relay may be:
- recharge battery (there is not enough released charge or electrolyte boils away);
- headlight brightness (it changes during the breakdown, when the shaft speed is 2 thousand / min. The voltage level is above the norm);
- burning smell inside the cabin.
Why breaks
The current relays are much more durable than their predecessors, but nothing is immune from failures. Contribute to this may, such factors as:
- short circuit;
- moisture penetration (can happen during car wash);
- mechanical damage;
- the quality of the product itself (the purchase of a device of unknown manufacturers does not guarantee a long service life).
When the relay is broken and overcharging occurs, it is necessary to diagnose the problem. There are two ways to check the generator voltage regulator - не shot с машины or shot. Consider both options.
Voltage test without removing the relay-regulator
How to check the relay-regulator without removing from the car?
Выявить «нехватку заряда» or «перезаряд» АКБ просто. При нехватке – машина не запустится, or же после вставления ключа мотор медленно начнет крутиться, иногда это сопровождается затуханием лампочек. При перезаряде – те же самые признаки, только причина будет крыться в закипании электролита. Понять это можно по его количеству в банках or белому налету на самом АКБ и вокруг него. Но следует убедиться точно, протестировав бортовой ток с помощью мультиметра, которым нужно измерить напряжение на клеммах батареи во время рабочего двигателя. Подметим, что нормальным напряжением может быть параметр – 12,7В, но если он ниже, например – 12В, то имеются неполадки.
Very often, the terminals themselves can be the culprit of the problems, since they are capable of oxidizing, therefore, before testing, it is necessary to remove the existing raids and nitrous at the terminals and contacts.
Stages of work:
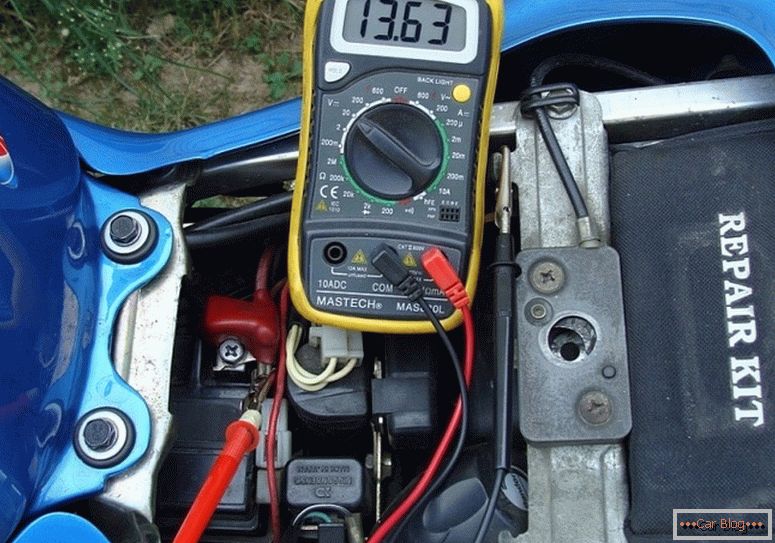
- Start the engine and warm up for a few minutes.
- Connect the multimeter test leads to the battery terminals, observing polarity. Set the value on the device to 20 volts.
- We look at the voltage when the dipped beam is on, at this time all other electrical consumers should be turned off. The shaft revolutions should be in the values of 1.5–2.5 thousand rpm. If a voltage within 13.5–14.8V, this is normal, and if it exceeds, then the relay is unusable. In the case when the input current is less than 13.5V, it is possible that the cause of the failure is either in the generator or in the wiring.
- Now we are lifting the load and estimating with increased revolutions up to 2000-2500 thousand rpm. To do this, run the high beam, stove, windshield wipers. The voltage should not be less than 13.5V and more than 14.8V.
How to check generator voltage regulator with multimeter мы рассказали, теперь приступаем к проверке совмещенной схемы реле-регулятора вместе со щеточным узлом, так как они наиболее популярны.
Check Relay Regulator
Testing of the removed regulator (with the scheme)
An electronic relay is most often mounted on the generator surface next to the generator shaft, along which the brushes move, in the region of the contact rings of the generator armature. The entire unit assembly is covered with a plastic cover. It is removed by a screwdriver form, which can be either a cross-shaped or a hexagon.
Stages of work:
- Turn off the two mounting bolts and remove the cover.
- We get a brush knot.
- We clean it from graphite dust.
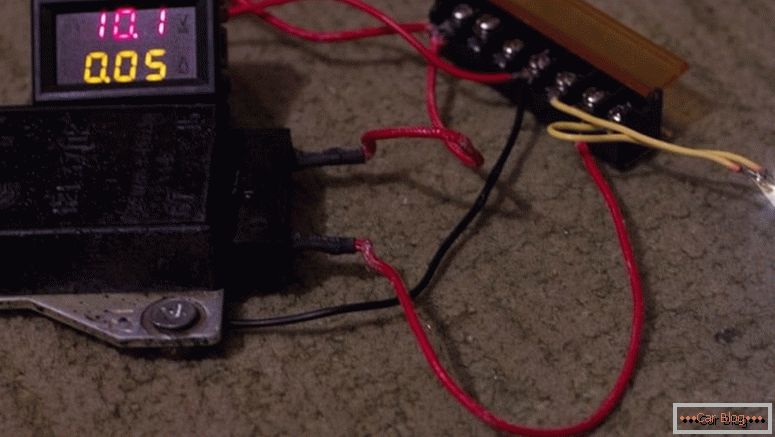
- Собираем схему с использованием блока питания, зарядкой or вольтметром. Находим простую лампу на 12В от машины, можно с «габаритов» и провода, чтобы соединить всю схему в одно целое. Используем АКБ, если зарядное без него не работает. Уже от него провод присоединяем к регулятору, а к щеткам подключаем лампу при помощи «крокодильчиков». Когда все подключено правильно лампа начнет светиться, потому что щеточный узел служит проводником электричества от вала.
- Raise the voltage on the charge to 14.5 V light should go out, since such a voltage as a "cutoff" further increase the voltage. After reducing the voltage on the charger, the lamp should light up again. If the voltage has risen to 15–16V, and the lamp is lit, then the relay is unusable.
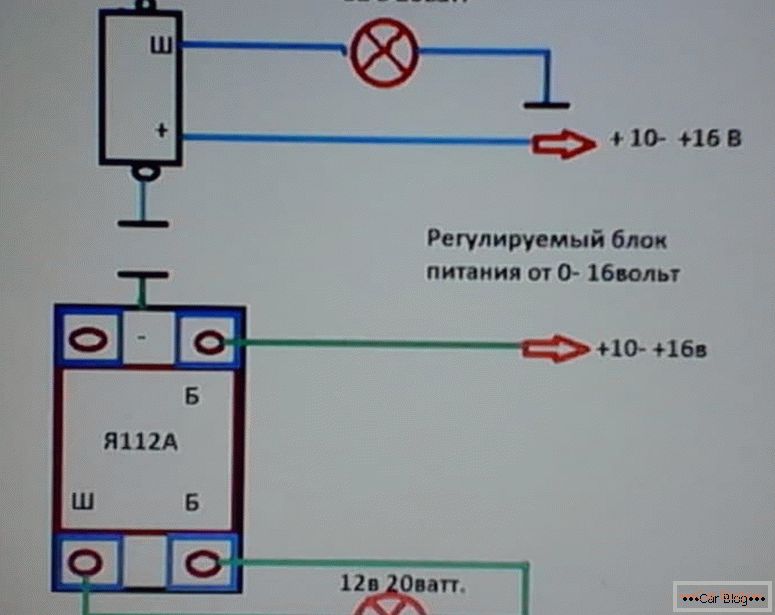
Check circuit of the relay-regulator
По тому же принципу можно проверить отдельный тип регулятора нового образца. Для этого необходимо отсоединить его от кузова or крышки генератора и прикрепить к схеме. Проверку осуществлять таким же образом. Что касается старого типа реле-регулятора, установленного на копейках, то проверять его нужно немного по-другому. Их marking - "67" and "15". The first contact “67” is a minus, and “15” is a plus. The rest of the principle is the same.


