The cold season in Russia lasts about six months. Although there are regions in the country and with a longer period of winter and a much harsher climate than in the middle belt. In this case, the installation of heated seats is not only not be unnecessary sophistication, but in fact is the first necessity.
The cars of the middle class of recent years are equipped with this option already from the factory, but earlier models or the budget level of transport deprive the driver and passengers of such an element of comfort. To solve this problem, you can contact the station and order tuning of the cabin, which will cost the car owner a decent amount. However, there is an option when you can reduce costs and get the desired result. You need to do everything yourself.
Content
- 1 Types of "Nezavodsky" autoheating seats
- 2 Reheated Heaters
- 3 Heating capes
- 4 Self-made heaters
- 5 How to choose a suitable design
- 6 Installation kit "Emelya"
- 7 Independent production of seat heater in the car
- 8 Conclusion
Types of "Nezavodsky" avtogogrevov seats
Before you do heated seats yourself, you need to figure out what are the ways of abnormal seat heaters in the car. Since not all variants of the proposed designs are universal, you can decide in advance on the choice of a suitable local heater.
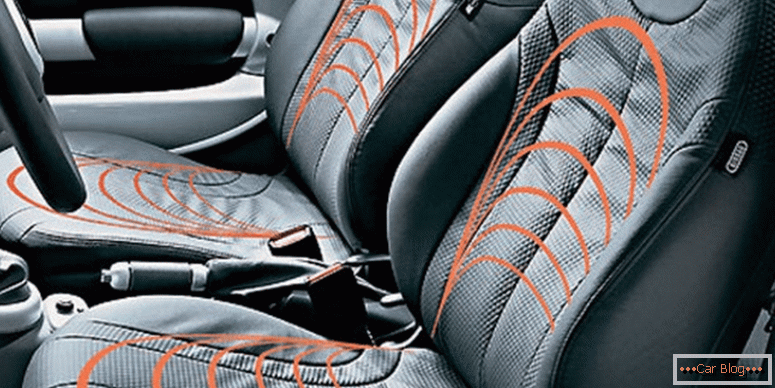
Heated seats
Reheated Heaters
There are standard kits for sale, for example, Emelya, in which there is a kit for installing a heater under the upholstery of a chair. You will need to add some fasteners to this kit, and you can mount it on two front seats.
The cost of such a set on average about four thousand rubles.
If you order the work on installing it at the station, then approximately the same amount will have to be paid for the installation. Although the result will be satisfactory.
pros:
- after installation is ready to work;
- inexpensive cost with self-assembly;
- esthetic appearance;
- the same heater for two seats at once;
- the ability to adjust the modes.
Minuses:
- it is necessary to open the seat upholstery;
- there are cheaper options;
- not included in the heated rear row;
- Not all newbies can do a high quality installation.
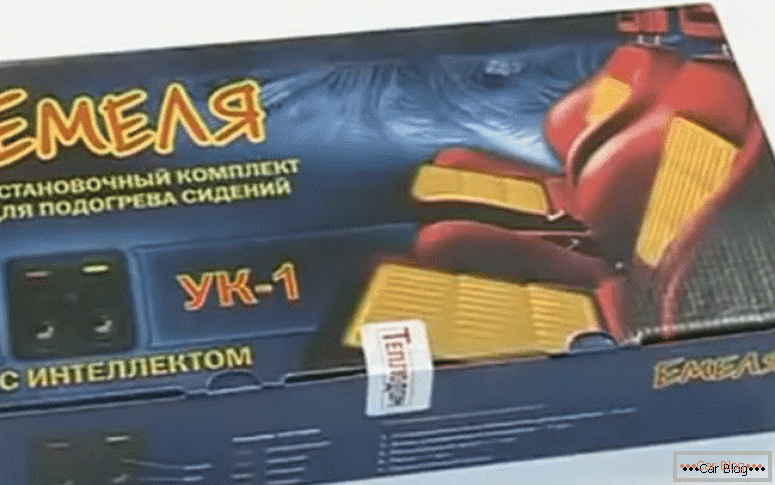
Heated "Emelya"
Heating capes
Not all local heaters need to be installed. Indeed, in the southern regions of the country, you can get by with temporary devices. In this case, a temporary cape with a heated seat on the car is quite suitable. For its installation does not require capital modifications in the cabin. It connects most often through the cigarette lighter socket.
Product cost varies from manufacturer. Minimum prices from 800 to 2000 rubles per copy per seat.
The most common countries manufacturers of this product:
- Poland;
- Germany;
- China.
Product weight from 0.6 to 0.9 kg. Heating can be either only for the lower part of the chair, or integrated, including a warm “back”. The seat heating button with this design is not located on the cable plugged into the power outlet. No installation is required.
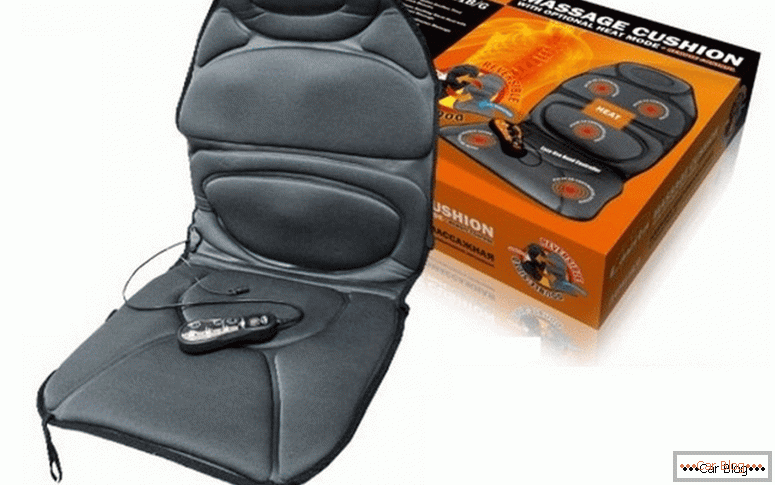
Capes for seat heating
pros:
- minimum cost;
- you can buy only for one driver's seat;
- quick assembly and disassembly;
- large selection of manufacturers;
- for inclusion it is not necessary to output separate wires, it is enough cigarette lighter socket;
- several preset modes;
- a large number of colors and styles.
Minuses:
- not quite an aesthetic look;
- for the second chair you need an additional plug in the cigarette lighter or a “tee”;
- Often there are poor-quality fakes that quickly fail.
Self-made heaters
Such a device can be made at home. It will cost heated seats with their hands cheaper than bought in the store. Practically any student who has had lessons in physics and labor will be able to assemble him..
Adjusting castors for narguev
pros:
- low cost;
- there are components for it in almost any home;
- You can set any power, shape and make connection methods;
- it is made independently without assistance;
- can be connected directly, leaving the cigarette lighter free.
Minuses:
- not always an aesthetic appearance;
- it is required to correctly calculate the power in order not to overload the battery or not to burn the wiring in the car;
- when mounting the button, it is required to insert into the panel or other parts of the plastic interior.
How to choose a suitable design
The main choice of local heaters in the car consists of German, Chinese, Polish or Russian products. The practice of using such products speaks in favor of products from Germany and from domestic companies. Although prices for European goods are higher, they also guarantee reliability.
In such heaters, various degrees of protection against overheating and high-quality adjustment with thermal relays are installed. Our companies, such as Avtoterm, which offer cheaper products, are not much inferior in quality. However, reinforced cables and fuses also ensure safety inside the cabin.
In the case of buying Asian products increases the risk of obtaining unreliable products.
You can often hear about the breakage of the buttons, the failure of the mode regulator or the melting of too thin wires. Products of unknown companies may cause a fire in the car, so when you buy, you must ask for the warranty card and check the manufacturer's certificate.
See also: Do-it-yourself car interior cleaningInstallation kit "Emelya"
To properly connect this heater on the packaging box is an assembly diagram that determines the sequence of actions. There are also applied ways to connect electrics to the car control unit. Before starting the installation, it is necessary to remove the seats from the passenger compartment.
-
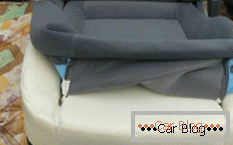
- Step 1. Dismantle the chair
-
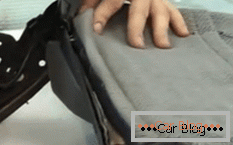
- Step 2. Remove the upholstery
-
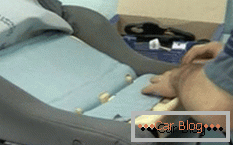
- Step 3. Fix the heating plates
-
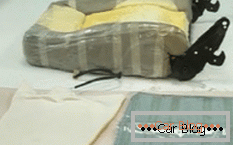
- Step 4. We assemble the structure
-
- Step 5. Display the contacts for the button and adjust
-
- Step 5. Connect to the wiring, according to the scheme
You need to know that some cars are equipped with a side airbag cartridge. When removing the seats with him, you must carefully handle that there is no trigger.
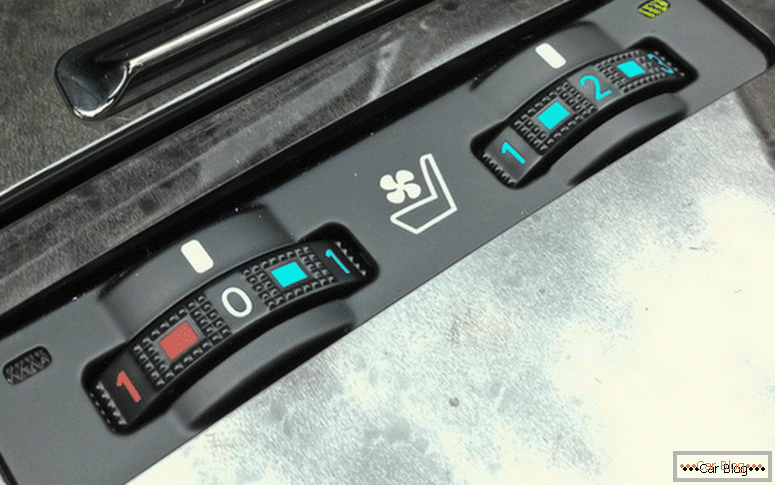
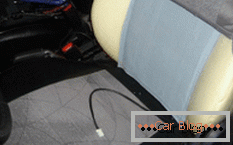
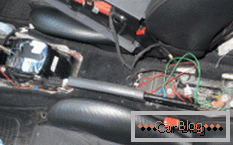
Heating sheets are mounted under the casing, so it is removed from the seat and backrest. Next, you need to fix the heaters in their places, bringing out the contacts for switching on. Next on the instrument panel is set the start button heating and connects to the chair and derived wiring harness from the fuses.
Connect to the wire from the battery, which shows the voltage of 12V only in the second position of the ignition key. Thus, additional protection against overheating is established.
The cable connecting the heating element with the button can be packed in a corrugated tube, and then hidden under the cabin mat.
Independent production of seat heater in the car
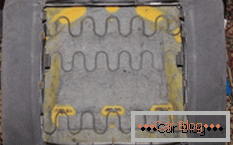
For the manufacture of the heater will need nichrome wire of about 10 m, with a diameter of 0.5 mm. We form four spirals, on a fixture of a wooden bar and two hammered nails, at a distance of 40 mm, curling the wire with the figure-eight, and not in a circle. For clarity, see the photo report below.
-
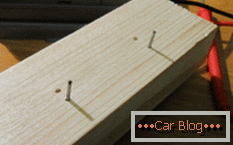
- Step 1. Making a device for the manufacture of a heating element
-
- Step 2. Fasten a heater to the base and connect wires to it.
-
- Step 3. Remove the upholstery and install the heater
-
- Step 4. Connect the wiring to the heater, regulator and button
-
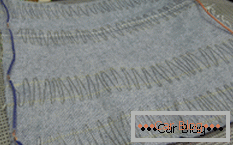
- Step 5. Making an aesthetic look in the cabin
Next, you need a dense natural fabric, preferably from old jeans or military camouflage uniforms, without synthetics and highly flammable materials. Connect the resulting spiral in a parallel way. You will need 12 V for power supply. The design capacity of the structure is about 40 W. Additionally mounted relay.
Conclusion
Equip the car seat heaters can be for every taste and wallet. For those who do not want to remove the trim fit seat covers. For residents of cold regions, it is wiser to equip the vehicle with stationary heated front and rear seats.


