Door trim may become unusable, for example, due to cracks or due to the loss of aesthetic appearance. In such a situation, it will require replacement. Most often, the driver's door is operated in passenger cars, so the greatest risks of getting damage are from this particular element of the interior.
If the car owner decides to carry out interior tuning, repair the window regulator or increase sound insulation, then he should first of all know how to remove the driver door trim.
Preparatory work
For domestic cars it is often enough to have a flat and cross-head screwdriver to put everything in order. In cars of foreign manufacture, special keys TORX15 / 20/30 will also be needed. You also need to stock up with repair plastic clips. Beginners can break them through carelessness, especially the risk during the cold season.
Before carrying out the work, you need to fold the terminal from the battery to protect the wiring and appliances from damage. As much as possible to save the surface from scratches in the event that you install a screwdriver closer to the holders and bolts.
Reducing the number of scratches will help simple wrapping a screwdriver with tape or a clean cloth.
Performing an operation
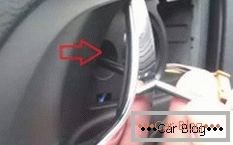
Consider removing the driver's door trim on the example of the Skoda Octavia A5. First of all, we hook the plastic edge of the module that regulates the position of the rear-view mirrors. This is done with a flat screwdriver. He will later be held on the wiring.
-
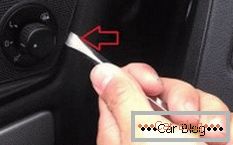
- Step 1. Turning down the adjustment mirrors
-
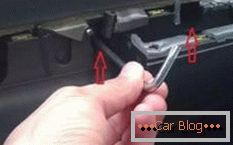
- Step 2. Raise the handle
-
- Step 3. Disconnect the plug
-
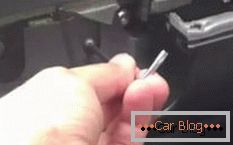
- Step 4. Unscrew the screws
-
- Step 5. Turn off the screw on the handle
-
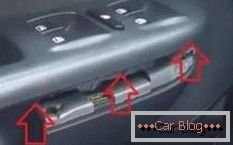
- Step 6. Remove the carrier fasteners
-
- Step 7. Remove clips
-
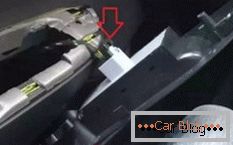
- Step 8. Disconnect the plug
At the next stage, dismantle the driver's handle. It is securely fixed, so you should make an effort, and then using a screwdriver through the gap that appears, snap off the clips. Disconnect the plug connection under the plastic surface.
Using the key TORX20 unscrew a pair of screws. One is in the middle of the opened space under the handle, and the second will be directly under the lever that opens the door. The large key TORX30 helps to unscrew three more screws.
See also: Photo waist skin of the carThe last two unscrewed from the bottom of the door. For them, you will need the smallest key with the TORX15 head.
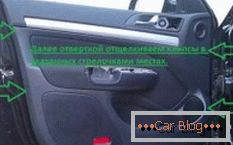
At the next stage, we use a flat screwdriver to separate the plastic clips at four points. The first pair will be closer to the door hinges, and the second pair will be opposite to them closer to the end with the castle part.
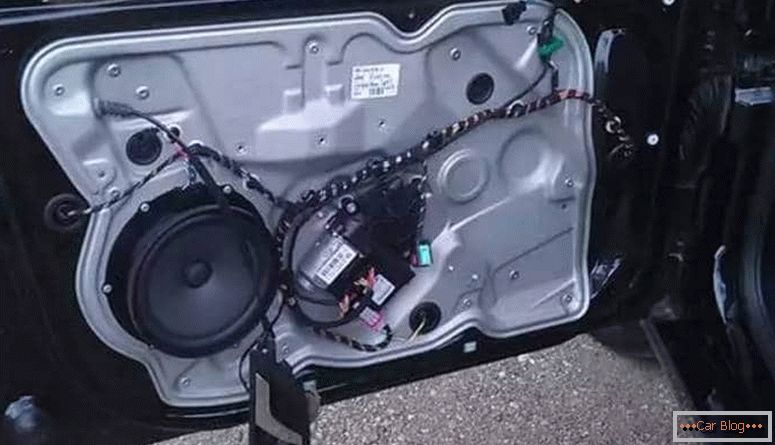
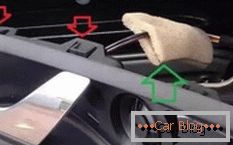
The handle will be fixed with a proprietary plug, hidden in foam rubber. Together with him we part the door illumination plug. After that, dismantle the door card.
Removing the card, it is worth examining clips for defects. Damaged items must be replaced with the whole, purchased in the repair kit.
After dismantling we carry out the necessary work. The assembly is carried out in the reverse order of disassembly.


