Развитие современных технологий привело к кардинальным изменениям в разных сферах. Исключением не стала и область автомобильной промышленности, в частности, современные достижения дали возможность автолюбителям тюнинговать свои машины собственными силами. Один из самых простых способов изменить внешний вид авто – установка ресничек на фары. В продаже «реснички» представлены в большом ассортименте – распространены разные модели: от дешевых до весьма дорогих. Все большей популярностью пользуются в последнее время светодиодные реснички. Многие думают что, такой интересный элемент, как cilia on the headlights нужно только заказывать. Спешим обрадовать экономных автолюбителей – cilia on the headlights своими руками можно сделать в условиях собственного гаража.
Content
- 1 Why do we need cilia for headlights
- 2 Manufacturing process
- 3 Cooking optics
- 4 We make out the lining
Why do we need cilia for headlights
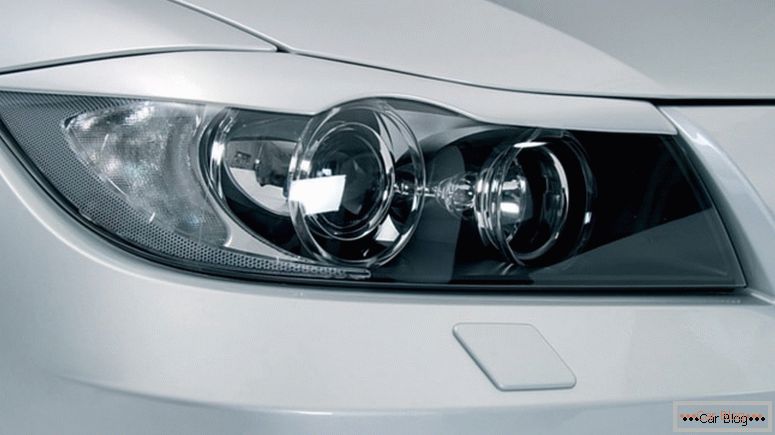
Cilia can greatly change the appearance of the car
In fact, it is a small special headlamp trim. Car owners are confident that the cilia for headlights can drastically change the appearance of the car. What functions are performed by decorative elements on optics:
- they help to visually transform rectangular lighting into semi-circular and back;
- protect the glass from mechanical damage (from stones or gravel);
- in principle, enhance the optics.
Thus, a minor element can radically change the appearance of the car. To confirm this, it is enough to place your tuned car next to the car without the appropriate addition. The difference to the rhinestone will be noticeable. Here's how such a small detail can affect the appearance of your iron friend.
Manufacturing process
In the manufacture of cilia should take into account one small nuance - the end result should not interfere with the normal operation of the optics of the car. In work with small details, perseverance, patience and attentiveness are required, as well as elementary skills in the use of tools. The main material for the manufacture of fiberglass is considered. Some craftsmen who have reached certain heights in this business use other materials. We will focus on the classic version of manufacturing using fiberglass. In addition, we need: masking tape, a little putty and epoxy.
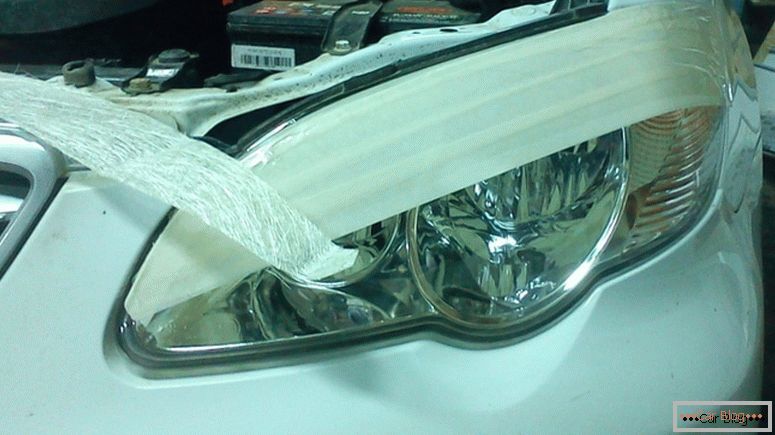
Before applying resin and fiberglass, the lights must be protected with masking tape.
Cooking optics
Since we will do the workpiece directly on the glass, the process begins with the dismantling of the optics. This is to simplify the process of laying layers of fiberglass on the headlights.
See also: Pinout sockets of a trailer carSequencing:
- We clean the surface of the headlights from various kinds of pollution.
- We glue with glass masking tape.
- We check the sealed areas for the presence of unfinished areas (this procedure is necessary to ensure the protection of the glass from resin sticking). Hardened resin without the help of special tools cannot be removed.
- Then proceed directly to the application of a layer of resin to the surface, gently attaching fiberglass to resin. Tip: to add extra strength, lay a few layers of the scan. Each layer should be allowed to dry before applying the next.
- After that, you just need to wait about three to six hours until the resin dries completely.
- After full drying, the workpiece must be removed from the working surface.
- By the same technology, blanks are made for the second headlight.
Then everything is very simple: you need to do the design of cilia. At this stage, you can give free rein to your imagination and bring your ideas to life. If the imagination refuses to help, then you can search for inspiration on the Internet - there are a huge number of stores selling similar decorative elements. They also can borrow a few original ideas.
We make out the lining
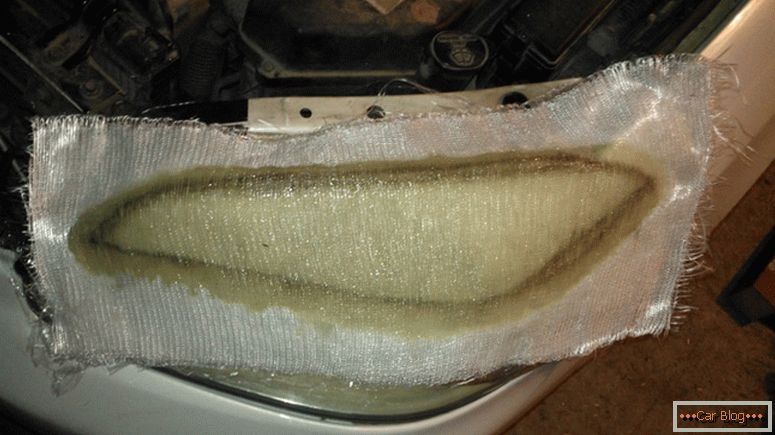
Fiberglass and resin applied in several layers
It is better to leave the prepared material aside for some time, so as not to spoil it with unsuccessful or careless movements. First, cut the template from ordinary adhesive tape and place it on the future installation site of the cilia. Get away from the car, inspect it from all sides, if you are satisfied with the end result, then you can begin to work with fiberglass. In order for the lines to have the necessary outlines, use a prepared stencil and a marker in your work. After applying the desired shape, cut out the blank with gentle movements. If you get burrs during work, you can remove them with sandpaper or scissors. Next you need putty - put a small layer of it on the workpiece.
See also: Do-it-yourself airbrushingAfter the putty dries, the surface should be sanded (it is advisable to gradually reduce the grit of sandpaper so that no scratches remain on the surface). It should be noted that in the manufacture of cilia sandpaper is better to wind on a wooden bar. This is necessary in order to give the paper the necessary rigidity that cannot be achieved simply by holding the paper in your hand. Movement should be circular. If after scratching, characteristic scratches are visible on the surface, then another layer of putty is applied, after which the grinding procedure is repeated.
After obtaining a smooth surface, you can proceed to the primer surface and paint. The result of the work is painted in any color that will appeal. The only logical wish is that the color should match or complement the overall look of the car. With the help of this decorative ornament you will create a qualitatively new image of your car.


