The performance of all vehicle systems depends on the smooth functioning of the elements among themselves. This applies to both new cars and the outgoing models of the “classics” of the domestic auto industry. Car owners of such vehicles are often interested in the procedure for adjusting the valves of the VAZ-2107. This is important to know, since during rotation of the crankshaft, their alternate opening / closing follows a single algorithm.
Content
- 1 The importance of fine tuning
- 2 Preliminary preparation
- 3 Adjustment operations
The importance of fine tuning
It should be borne in mind that adjusting the valves VAZ 2107 injector do it yourself is available to all motorists even in garage conditions with a minimum set of tools. Often, the operation is carried out on a hot engine, although it is preferable to do it "on the cold." The result will be more accurate readings.
It is important to know that the setting of the VAZ 2107 valves (injector) will require the purchase of two types of probes: 0.15 mm for monitoring the cold engine and 0.20 mm for monitoring a hot engine.
There are probes of various sizes available. It is preferable to use wide ones, as they are more comfortable to use, and often they are sold in pairs. As a result, proper adjustment and adjustment will be able to achieve the following results:
- camshaft timing will work most accurately;
- working cylinders will be filled to the full with the air-fuel mixture;
- the mixture will burn to the fullest extent;
- high-quality blowing of the devastated cylinders.
Correctly installed valve clearance VAZ 2107 (injector) will give a cleaner engine operation at the output, possible knocks will come out of the engine compartment, the operating life of the vehicle will significantly increase. This factor is a consequence of the lack of impact of the cam of the camshaft on the rocker (actuator lever) or valve axis. Thus, these details will be able to serve much longer if the adjusting clearances are clearly provided.
However, clearance reduction is considered more problematic for engine operation. With such a position, the chance of valve burning out increases, because it does not have time to settle into the saddle of the cylinder head. An aggressive exhaust gas from the combustion chamber is directed through the cracks formed. Its temperature during the explosion phase reaches 2000C, which leads to burning through the edges of the exhaust valve. Also adversely affected are valve seals due to overheating, which is accompanied by increased oil consumption and contamination by combustion products.
See also: Do-it-yourself starter retractor repair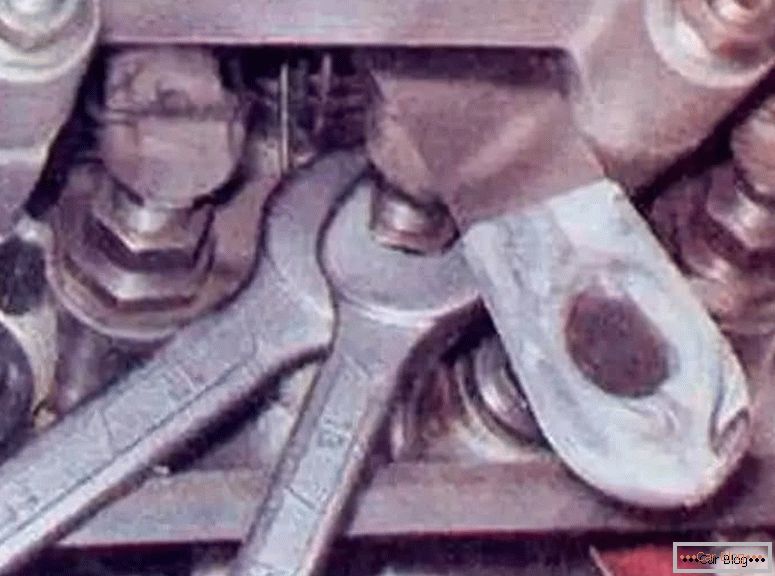
The importance of adjustment is obvious for the performance and increase the resource of cars. Control should be carried out depending on the degree of operation after 10-15 thousand kilometers.
Preliminary preparation
Before adjusting and adjusting, it is worth to stretch the chain to an acceptable level if it is loose. To do this, under the hood there is an appropriate device.
After removing the valve cover, you need to check and place the labels in the correct positions. Lower risk on the crankshaft pulley and a small tide on the cover in front of the cylinder block, as well as the top trough on the camshaft sprocket and tide on the camshaft bed.
Adjustment operations
The actual scheme of adjustment of valves VAZ 2107 consists of the following combinations:
- sixth-eighth;
- fourth to seventh;
- first to third;
- fifth to second.
The entire countdown starts from the crankshaft sprocket. When the first pair is adjusted, then crank the crankshaft half a turn (180 degrees). This will allow to transfer the necessary pistons to the extreme upper position of one of the working cycles.
Next, we analyze how to adjust the valve on the VAZ 2107 (injector). To do this, set the crankshaft to the starting position in accordance with the labels. They will allow to transfer the fourth cylinder to the top dead center. In this case, the distributor slider will be opposite the contact. This item allows you to adjust these valves:
- on the 7th and 8th cam - exhaust and intake valve on the 4th cylinder;
- 4th cam - the outlet is 2-m;
- 6th cam - outlet on the 3rd.
We control the gap, introducing the probe into the space around the rockers. The best is the passage with little effort at the beginning, and then it is easier to enter. This position does not need restructuring.
If the measuring tool comes freely or can not squeeze through, then you need to use the keys. We release the retaining nut with a wrench for 17, then use the horn for 13 to tighten or loosen the gap. We scramble with a horn at 17. We check again, and then we proceed in this way in each case.
See also: How the car behaves if the lambda probe does not workScroll the crankshaft at 60 degrees so that the slider is against the contact of the first cylinder. In the new position, the following valves are adjusted:
- 1st cylinder inlet and 1st cylinder;
- on the 2nd cylinder intake;
- on the 3rd cylinder exhaust.
We measure the approach using a similar method, as in the previous position. After all clearances are adjusted, turn the crankshaft for a few (3-4 minimum) turns with a key for 38 per nut. Now it is worth making control measurements on all valves in the original sequence.
Having achieved optimal positions, close the head cover (pencil case) and start the engine. With proper performance of work, the possible clatter of unbalance should completely disappear. If the knocking sound is heard again, then you should diagnose more carefully, extending the troubleshooting.


