Most cars on our roads have a MacPherson suspension. No exception are the products of the domestic auto industry. In its system, an important role is assigned to the support bearings, which are used as a bundle between the vehicle body and the front suspension.
Content
- 1 Operational functionality
- 2 Frequent operational problems
- 3 The financial side of the issue
- 4 DIY Replacement
Operational functionality
Many factors depend on the performance and efficiency of the performance of the tasks of the EP:
- quality control of a particular machine;
- comfort during the trip;
- travel safety for all road users.
The main thing - do not miss the moment in which you will need to replace the front axle support bearing. At the same time, it is required to timely diagnose and monitor the current state of the node.
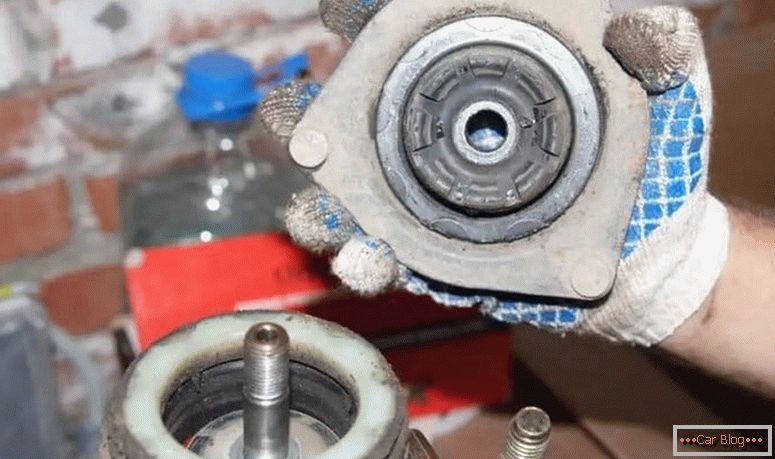
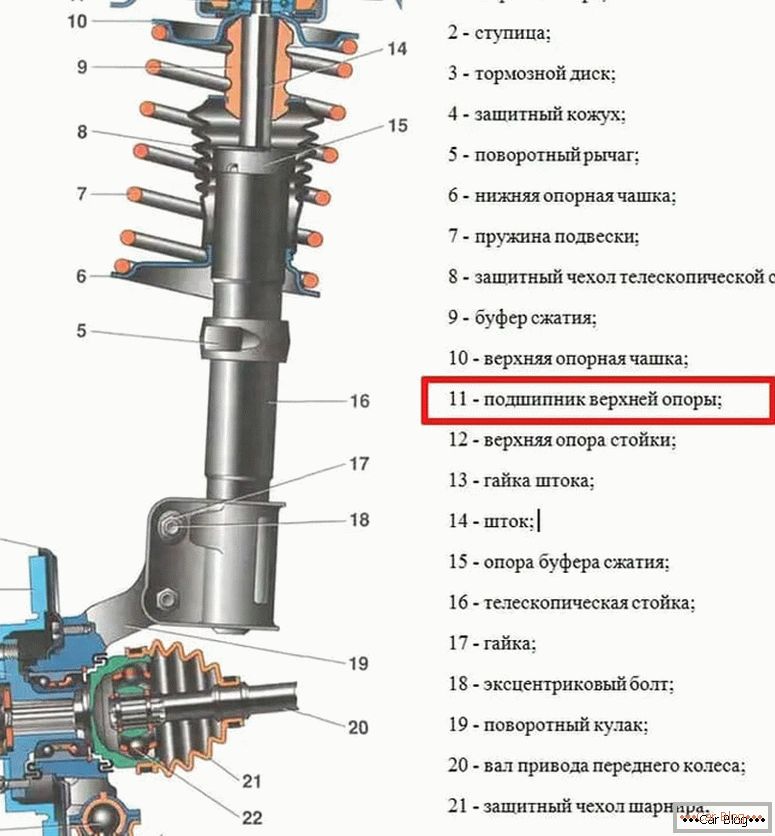
Front strut bearing It includes items such as:
- rubber separator;
- steel balls moving in the separator;
- a pair of functional pads used as upper and lower protection of the structure.
In Priory, this element is hidden in the process glasses of the front shock absorbers. This is noticeable when looking at the engine compartment on each of their wheels.
Frequent operational problems
When the bearings of the bearing fails, a characteristic knock appears in front. He is heard while driving on poor-quality road in the area of the upper rack. Often the signal appears after the deformation or damage to the integrity of the body, as well as breakage of the gasket.
The reason lies in most cases in one of the following points:
- cars operated for a long period on poor roads;
- threshold of dynamic resistance exceeded;
- a lot of dust, moisture, dirt got into the working unit.
Before replacing the thrust bearing of the A-pillar, you need to carry out diagnostic simple measures yourself. To do this, open the hood and remove the protective cover from the glass. Put the palm directly on the support and try to shake the car in a vertical axis. When the part is faulty, there will be a knock and small vibrations that indicate the necessity of replacement.
You need to know that the manufacturer has set an approximate maximum mileage for support bearings Priors 100 thousand km.
However, this does not mean that the part in reality is capable of going out this resource on domestic roads. Often, it must be removed after half of the specified mileage. Also, the replacement is carried out in identifying operational problems at earlier stages.
See also: How to change the ball jointThe financial side of the issue
Excluding delivery, the cost of this part for Priora, according to Yandex Market, is from 350 rubles. excluding shipping. To choose the right, you must specify the number from the catalog - 2170-2902821 RU. If desired, the car owner can independently select progressive models from third-party manufacturers that satisfy the operating parameters. However, they will cost significantly more - 2-3 times.
Most often, the product is represented by such trademarks as TRACK, FENOX, SS-20, ASOMI. It is worth taking into account the cost of work on the service station. For them will have to pay the amount of 500 rubles. Those who want to completely change the support, depending on the region, must pay from the interval of 1300-3200 rubles. You can save and carry out all the work in the garage conditions on their own.
DIY Replacement
Step-by-step algorithm consists of the following actions:
- the car is installed on a flat horizontal platform;
- at the expense of the jack we raise it from the problem side;
- we unscrew the nut of the steering tip and unscrew it with a wrench for 19;
- in the presence of a stripper, we press out the tip finger, when there are no special tools under our hands, then we use a half-kilogram hammer and mount, however, it is important to control the process so as not to damage the thread;
- in the next step, a pair of nuts are retained, which hold the rack in the cam, they are often pre-treated with anti-corrosion fluid, for example, VD-40;
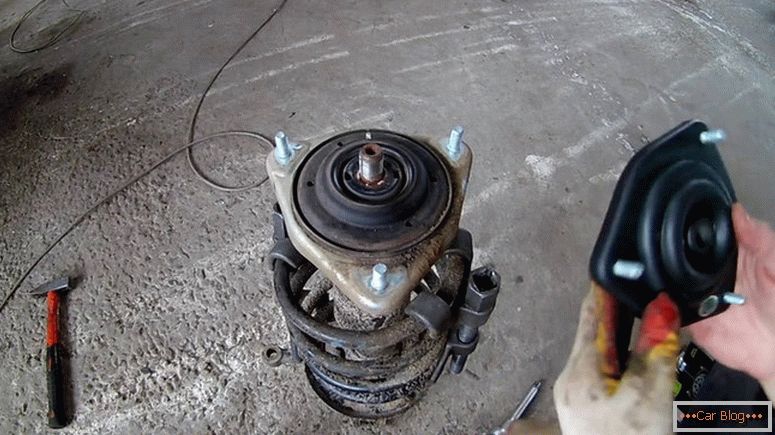
- in the engine compartment, remove the glass cover and unscrew the three nuts securing the support;
- the shock absorber needs to be pulled down;
- You will need two couplers for the springs, which will help reduce the load on the upper support;
- unscrew the nut fixing the support to the rack;
- dismantle the support and, having disassembled, take out the non-working bearing;
- we put a new part in exchange for the old one and fix everything on the shock absorber;
- Assembly is traditionally carried out in the reverse order of disassembly.
Most experienced professionals change this detail on both sides, as often their condition will be similar. After this procedure, it is mandatory to adjust the camber angle.
See also: Choosing the best shock absorbers: gas, oil or gas oil

